



Effective rental property maintenance is one of the most important responsibilities for landlords and property managers. Well-managed maintenance and repairs reduce vacancies, protect property value, and improve tenant satisfaction. Poor maintenance, on the other hand, leads to higher costs, legal risk, and negative tenant experiences.
This guide explains how landlords can manage maintenance and repairs efficiently, using clear workflows, preventive strategies, and modern tools—without overcomplicating daily operations.
This guide is part of our rental management guides for independent landlords, covering the key workflows involved in managing rental properties efficiently.
Rental property maintenance refers to the ongoing process of keeping a rental unit safe, functional, and compliant with housing standards. It includes routine upkeep, preventive maintenance, emergency repairs, and tenant-reported issues.
For landlords, maintenance is not optional. It directly impacts:
Landlords are typically responsible for maintaining:
Understanding landlord maintenance responsibilities helps avoid disputes and ensures faster resolution of repair requests.
Most maintenance issues originate from tenant requests, making communication workflows critical.
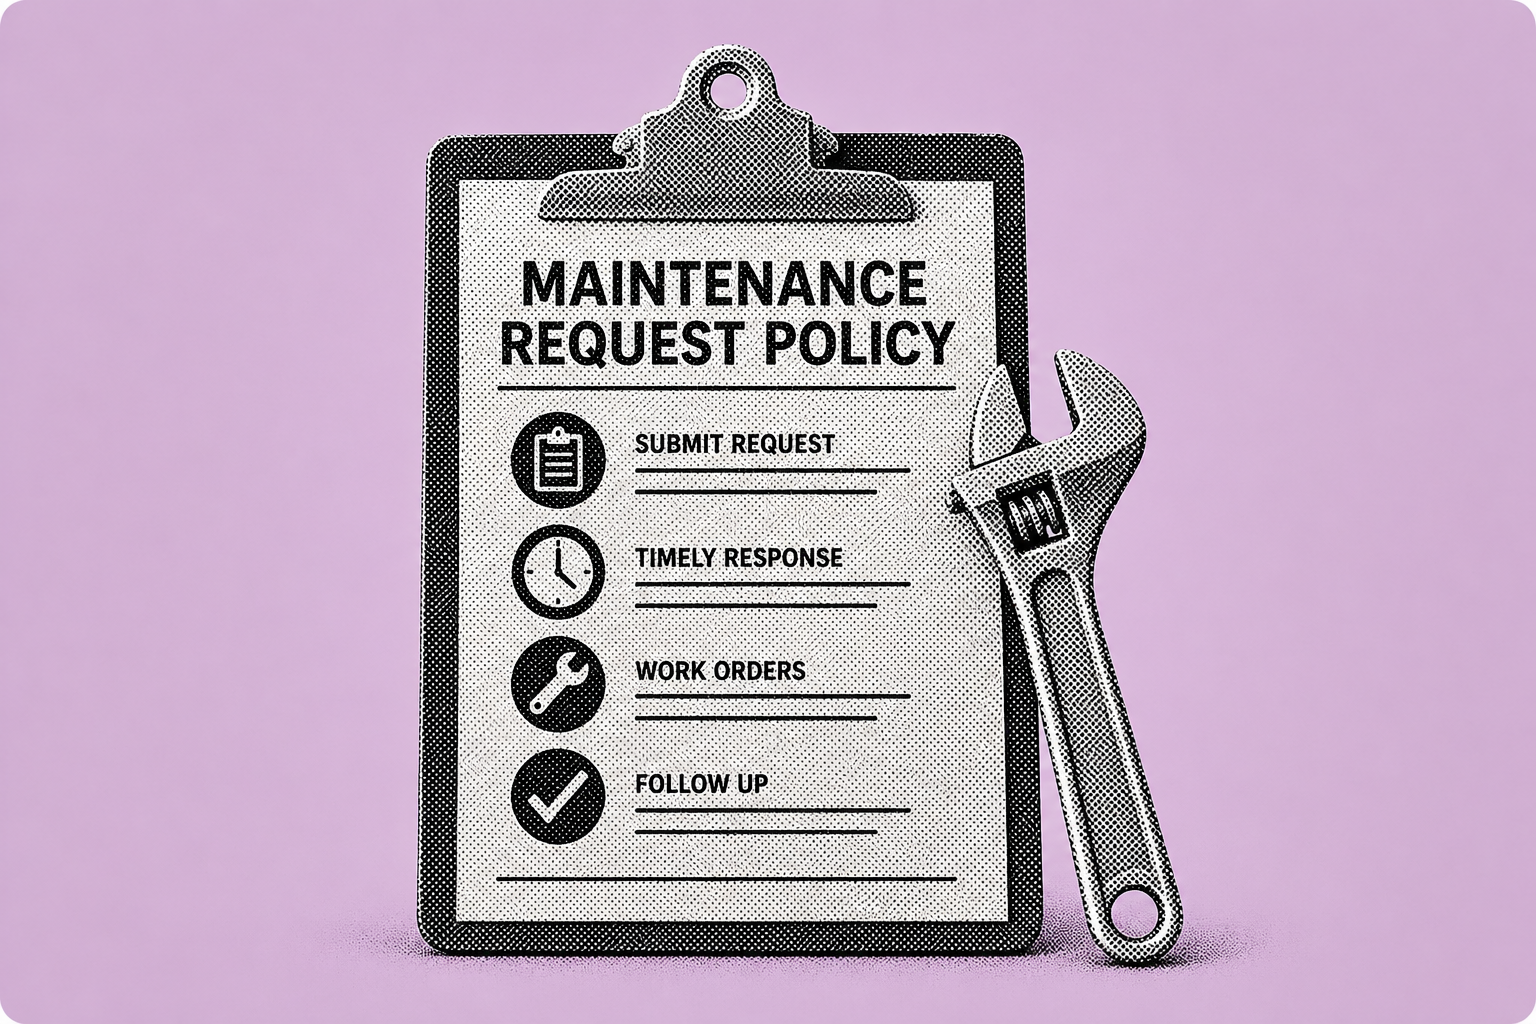
Handling maintenance requests manually often leads to delays and missed issues. A structured rental maintenance management process improves response time and transparency.
Best practices include:
This approach helps landlords stay organized and reduce unnecessary follow-ups.
Responsive maintenance is one of the primary ways landlords build a reputation that drives renewals — see the standing out as a quality landlord guide for the full service standards framework.
Preventive maintenance for rental properties focuses on identifying and fixing small issues before they become costly repairs.
Examples include:
Preventive maintenance reduces emergency repairs and extends the life of major systems.
Timely maintenance plays a major role in tenant retention and renewal decisions.
Emergency repairs involve issues that affect health, safety, or habitability—such as water leaks, power failures, or heating system breakdowns.
To manage emergencies effectively:
Clear emergency workflows reduce tenant frustration and legal exposure.
Reliable vendors are essential for effective property repairs management. Landlords should focus on:
Documenting expectations helps maintain consistency and accountability across vendors.
Modern rental maintenance management tools help landlords:
Technology simplifies maintenance operations and provides visibility across multiple properties without increasing administrative workload.
Use this checklist to manage maintenance and repairs consistently:
Rental property maintenance includes routine upkeep, preventive care, and repairs required to keep rental units safe, functional, and compliant with regulations.
Landlords are generally responsible for structural elements, essential systems, safety features, and appliances provided with the rental.
Landlords should centralize requests, prioritize urgent issues, communicate timelines clearly, and document all repairs.
Emergency repairs involve issues that affect safety or habitability, such as water leaks, heating failures, or electrical hazards.
Preventive maintenance reduces long-term repair costs, prevents emergencies, and improves tenant satisfaction.
Managing maintenance and repairs becomes significantly easier when requests, priorities, and repair histories are organized in one place. Many landlords choose to use rental management platforms like Shuk Rentals to centralize maintenance requests, track repairs, coordinate vendors, and maintain clear communication with tenants—helping reduce delays and improve overall efficiency without increasing administrative workload.
Effective rental property maintenance is one of the most important responsibilities for landlords and property managers. Well-managed maintenance and repairs reduce vacancies, protect property value, and improve tenant satisfaction. Poor maintenance, on the other hand, leads to higher costs, legal risk, and negative tenant experiences.
This guide explains how landlords can manage maintenance and repairs efficiently, using clear workflows, preventive strategies, and modern tools—without overcomplicating daily operations.
This guide is part of our rental management guides for independent landlords, covering the key workflows involved in managing rental properties efficiently.
Rental property maintenance refers to the ongoing process of keeping a rental unit safe, functional, and compliant with housing standards. It includes routine upkeep, preventive maintenance, emergency repairs, and tenant-reported issues.
For landlords, maintenance is not optional. It directly impacts:
Landlords are typically responsible for maintaining:
Understanding landlord maintenance responsibilities helps avoid disputes and ensures faster resolution of repair requests.
Most maintenance issues originate from tenant requests, making communication workflows critical.
Handling maintenance requests manually often leads to delays and missed issues. A structured rental maintenance management process improves response time and transparency.
Best practices include:
This approach helps landlords stay organized and reduce unnecessary follow-ups.
Responsive maintenance is one of the primary ways landlords build a reputation that drives renewals — see the standing out as a quality landlord guide for the full service standards framework.
Preventive maintenance for rental properties focuses on identifying and fixing small issues before they become costly repairs.
Examples include:
Preventive maintenance reduces emergency repairs and extends the life of major systems.
Timely maintenance plays a major role in tenant retention and renewal decisions.
Emergency repairs involve issues that affect health, safety, or habitability—such as water leaks, power failures, or heating system breakdowns.
To manage emergencies effectively:
Clear emergency workflows reduce tenant frustration and legal exposure.
Reliable vendors are essential for effective property repairs management. Landlords should focus on:
Documenting expectations helps maintain consistency and accountability across vendors.
Modern rental maintenance management tools help landlords:
Technology simplifies maintenance operations and provides visibility across multiple properties without increasing administrative workload.
Use this checklist to manage maintenance and repairs consistently:
Rental property maintenance includes routine upkeep, preventive care, and repairs required to keep rental units safe, functional, and compliant with regulations.
Landlords are generally responsible for structural elements, essential systems, safety features, and appliances provided with the rental.
Landlords should centralize requests, prioritize urgent issues, communicate timelines clearly, and document all repairs.
Emergency repairs involve issues that affect safety or habitability, such as water leaks, heating failures, or electrical hazards.
Preventive maintenance reduces long-term repair costs, prevents emergencies, and improves tenant satisfaction.
Managing maintenance and repairs becomes significantly easier when requests, priorities, and repair histories are organized in one place. Many landlords choose to use rental management platforms like Shuk Rentals to centralize maintenance requests, track repairs, coordinate vendors, and maintain clear communication with tenants—helping reduce delays and improve overall efficiency without increasing administrative workload.

Shuk helps landlords and property managers get ahead of vacancies, improve renewal visibility, and bring more predictability to every lease cycle.
Book a demo to get started with a free trial.

When you self-manage a portfolio, even just a few units, the hardest part of buying a rental property is not finding listings. It is filtering dozens of maybe deals down to the few worth your time. Between listing photos, rough rent estimates, shifting interest rates, and market headlines, you can burn hours underwriting properties that were never going to cash flow.
That is why rent-to-price rules of thumb exist. They are not meant to replace real analysis. They help you triage: move quickly, rule out obvious mismatches, and focus your energy where you will get the best return. Among these quick filters, the 2% rule is the most aggressive.
The formula is simple. A property's monthly gross rent should be at least 2% of your total acquisition cost, meaning purchase price plus rehab. If you buy for $150,000 all-in, you would want $3,000 per month in rent.
The catch is that after post-2020 home price increases, the classic 2% benchmark is now rare in many U.S. metros, especially coastal and high-growth markets. That does not make it useless. It means you need to understand when it works, where it breaks, and what to do next once a property passes or fails the screen.
The 2% rule is a rent-to-cost test: a quick rental income metric that compares gross monthly rent to what you invested to acquire the property. Most definitions specify total acquisition cost as purchase price plus rehab needed to get the unit rent-ready. In real-world underwriting, you will often also want to consider closing costs, initial leasing costs like paint and lock changes, and immediate safety or code items.
The higher the monthly rent is relative to what you paid, the more room you typically have to cover operating expenses including taxes, insurance, repairs, vacancies, and property management, and still produce cash flow. That is why percentage rules became popular among cash-flow investors in lower-cost Midwestern markets and why they have been widely discussed in landlord education communities since the early 2000s.
Here is what the 2% rule does not do. It does not account for local expense structures, which can vary dramatically by county and state. It does not incorporate financing terms including interest rate, down payment, or loan structure. It does not measure profitability directly because it ignores vacancy, maintenance, capital expenditures, and tenant turnover. And it does not capture appreciation expectations, which research has shown can be a major component of long-run returns.
Because of those omissions, the 2% rule is a fast smell test, not a full inspection. Use it as a starting filter, then validate the deal with expense-based metrics like cap rate, cash flow projections, and debt service coverage analysis.
The calculation is straightforward.
Rent-to-cost ratio = Monthly gross rent divided by total acquisition cost.
A property meets the 2% rule if monthly gross rent is at least 2% of total acquisition cost.
Run the metric two ways for consistency. The core test uses purchase price plus rehab, which aligns with the most common definition. The conservative test adds estimated closing costs and initial leasing expenses, which is closer to your true cash invested. Rules of thumb are already blunt instruments. If your inputs vary deal to deal, the rule produces noise instead of signal.
The biggest reason landlords get discouraged by the 2% rule is that they apply it in markets where it is structurally unlikely. Recent Zillow data illustrates why this matters.
Los Angeles shows average home values near $941,985 and average rents around $2,658, producing a rent-to-value ratio of roughly 0.28% per month. Seattle shows average home values near $848,869 and average rents around $2,258, producing roughly 0.27% per month. Indianapolis shows average home values near $223,231 and average rents around $1,463, producing roughly 0.66% per month. Cleveland shows average home values near $113,669 and average rents around $1,250, producing roughly 1.10% per month. Tampa shows average home values near $369,079 and average rents around $2,213, producing roughly 0.60% per month.
These are broad metro averages, not deal-specific comps. But they illustrate a critical point: the same 2% threshold implies dramatically different feasibility depending on local prices, rent ceilings, and supply and demand conditions.
Instead of asking whether a market meets 2%, ask what rent-to-cost ratios are typical there, and if 2% is unrealistic, what threshold reliably indicates a workable cash-flow candidate. Many modern investor discussions treat 1% or even 0.8% as more realistic in many areas, while still using 2% as a home-run screen in low-cost or distressed value-add contexts.
A landlord finds an older house in the Cleveland area priced below the broader metro average, needing moderate rehab.
Purchase price: $95,000. Rehab to rent-ready: $15,000. Total acquisition cost: $110,000. Expected monthly gross rent: $1,950.
Dividing $1,950 by $110,000 produces a ratio of 1.77% per month. To meet the strict 2% rule, the property would need $2,200 per month in rent.
This property fails the 2% threshold, but it is close. In many real-world scenarios, a 1.7% to 1.8% ratio may still be worth full underwriting, especially if the rehab estimate is tight, tenant demand is strong, and the neighborhood risk profile fits your management capacity. Cleveland's broader metro average produces about 1.10% rent-to-value. A deal at 1.77% is significantly above that average, suggesting a favorable purchase basis, above-average achievable rent, or both. That is often what a good deal looks like in a low-cost market: you are outperforming the typical rent-to-price relationship, not chasing a mythical 2% in every zip code.
A landlord evaluates a small duplex in Los Angeles with strong tenant demand but a high acquisition cost.
Purchase price: $950,000. Rehab and turnover work: $25,000. Total acquisition cost: $975,000. Expected monthly gross rent for both units combined: $5,400.
Dividing $5,400 by $975,000 produces a ratio of 0.55% per month. To meet the 2% rule, the property would need $19,500 per month in gross rent, which is far beyond typical long-term rents for most small multifamily properties in any market.
In coastal markets, investors often justify acquisitions through a different return mix: lower current yield paired with potential long-term appreciation, rent growth, tax advantages, and inflation hedging. Academic work on rent-price dynamics confirms that expected capital gains can heavily influence buying behavior even when rent ratios are low. That is precisely why simplistic ratios can mislead if treated as universal laws rather than market-relative tools.
The 1% rule is the more commonly cited version: monthly gross rent should be at least 1% of total acquisition cost. It became widely popular through mainstream landlord education and investor communities and is generally treated as a first-pass filter before deeper underwriting.
The practical difference comes down to thresholds. The 2% rule is a very high bar, often indicating a low purchase price relative to rent, significant distress or value-add, or a higher-risk area where prices are low for a reason. The 1% rule is still a strong quick screen in many markets but is challenging in most coastal metros given current pricing.
Use both as a funnel. If a deal meets 2%, treat it as a priority but scrutinize neighborhood quality, tenant demand, and deferred maintenance, because too good can mean hidden risk. If it meets 1% but not 2%, underwrite it because it may still cash flow depending on expenses and financing. If it fails 1%, do not automatically discard it in expensive markets, but require a strong alternative thesis: appreciation potential, development optionality, ADU value, or a clear repositioning plan.
Both metrics compress a deal into a single number, but they answer different questions.
The 2% rule uses gross monthly rent and acquisition cost, ignores expenses and financing, and is best as a fast screening tool. Cap rate uses net operating income divided by purchase price, which means it reflects operating reality more accurately because it accounts for taxes, insurance, repairs, management, and other operating costs. Cap rate still ignores financing, but it captures the expense differences that the 2% rule cannot see.
Two properties can have identical gross rent and identical acquisition cost but wildly different cap rates if one sits in a high-tax county, a higher-insurance region, or a property with major capital expenditure coming due. A practical workflow for self-managing landlords: use the 2% or 1% rule to filter, then estimate a quick cap rate to sanity-check the operating story, then run full financing and cash flow projections including cash-on-cash return, debt service coverage, and stress tests.
Property taxes and insurance can break a deal that passes the 2% screen. Expense structures vary by location and are not captured in a gross-rent ratio. Never buy the ratio without validating expenses first.
Post-2020 pricing has made 2% rare in many markets. Many landlords now operate with a tiered target: 2.0% as exceptional, typically limited to value-add, distressed, or very low-cost market scenarios; 1.0% to 1.5% as the more common cash-flow hunting range in many non-coastal markets; and 0.5% to 0.9% as common in high-cost metros requiring a different investment thesis.
Property type also matters. A duplex or fourplex may produce more rent per dollar of purchase price than a comparable single-family in the same neighborhood. Some high-demand single-family neighborhoods command a rent premium, but purchase prices often outpace rents, pushing ratios down. Broad Zillow averages in Los Angeles and Seattle confirm this dynamic at the metro level.
Use this when scanning listings or reviewing off-market leads. Apply the same inputs and the same math consistently so you do not treat deals differently based on how much you like them.
Inputs: Purchase price. Rehab to rent-ready. Closing and initial leasing costs (optional but recommended). Projected monthly gross rent.
Calculations: Core all-in cost equals purchase price plus rehab. Core rent-to-cost ratio equals monthly rent divided by core all-in cost. Conservative all-in cost adds closing and initial costs. Conservative rent-to-cost ratio equals monthly rent divided by conservative all-in cost.
Decision rules: At 2.0% or above, flag as priority and proceed to full underwriting, but scrutinize neighborhood quality, deferred maintenance, and confirmed rent comps. Between 1.0% and 1.99%, underwrite the deal because it may be viable depending on expenses and financing. Below 1.0%, proceed only with a clear alternative thesis covering appreciation, redevelopment potential, exceptional rent growth, or a positioning plan that supports the acquisition at that price.
Next numbers to pull before making an offer: Rent comps for the same bedroom and bathroom count in similar condition. Taxes and insurance estimates using local sources rather than national averages. A rough annual expense budget covering maintenance, reserves, and vacancy. A quick cap rate calculation to compare against what the rent-to-cost ratio suggests.
Is the 2% rule still realistic in 2026?
In many U.S. markets, especially high-cost coastal metros, the traditional 2% rule is rarely achievable for standard long-term rentals because prices have outpaced rent growth. Zillow's broad metro data illustrates the gap clearly: in Los Angeles, average home values near $941,985 paired with average rents around $2,658 produce a rent-to-value ratio far below 1%, let alone 2%. That said, 2% can still appear in specific situations including distressed purchases, heavy value-add rehabs, low-cost neighborhoods, and certain rental operations. Use it as a home-run screen rather than a universal expectation.
Does meeting the 2% rule guarantee positive cash flow?
No. The 2% rule is based on gross rent and acquisition cost and ignores operating expenses and financing entirely. A property can pass the screen and still cash flow poorly if taxes, insurance, maintenance, utilities, or turnover costs are high, or if financing terms are unfavorable. Treat it as the first filter, then validate the deal with expense-based metrics like cap rate and a full financing-based cash flow model.
What is the difference between the 1% rule and the 2% rule?
They are the same concept with different thresholds. The 1% rule says monthly gross rent should be at least 1% of total acquisition cost. The 2% rule uses 2% and is therefore much stricter. In today's pricing environment, many investors view 1% as challenging but sometimes workable in lower-cost markets, while 2% is often limited to unusually strong cash-flow deals or higher-risk areas.
If my market cannot hit 1% or 2%, what should I use instead?
Do not force a national rule onto a local market. In expensive metros, broad market data shows rent-to-value ratios closer to a fraction of 1% at the metro level. In those environments, shift your screening toward realistic cap rate estimates, conservative cash flow after financing, and a clearly articulated long-term thesis covering appreciation, rent growth, and repositioning potential. Percentage rent rules do not capture expected capital gains, which research confirms can be a major driver of investor returns in high-cost markets.
If you want to track rent-to-cost ratios alongside the operating metrics that actually drive long-term performance, book a demo to see how Shuk helps landlords monitor income trends, vacancy, and portfolio health from one place.

Most rental property mistakes do not come from bad intentions. They come from using the wrong time horizon. A first-time landlord buys a cash-flowing duplex, then panics when the first month includes a vacancy, a plumbing surprise, and a slower-than-expected lease-up. A small-portfolio owner rejects solid properties because they do not hit a quick-rule benchmark like the 1% rule, only to realize later that modest early cash flow can become strong wealth-building over time. And many self-managing landlords underestimate the 30-year compounding effect of amortization, rent growth, and inflation working together.
The 3-3-3 Rule is an investor-driven heuristic that forces you to evaluate a rental the way it actually performs: in phases. The framework adapts the spirit of a widely used real estate discipline tool into a time-horizon evaluation system built around three distinct windows.
The first 3 months ask whether you can stabilize operations and validate the underwriting assumptions. The first 3 years ask whether you can prove the asset's economics through occupancy, rent strategy, expense control, and refinance or sell options. And 3 decades ask whether the property meaningfully builds net worth through amortization, inflation-adjusted rent growth, and long-run appreciation.
Before you buy or sell a rental, the most important question is which of the three horizons you are optimizing for and which ones you are willing to temporarily underperform.
The 3-3-3 Rule is best understood as a practical, investor-driven framework that improves decisions by forcing time-based thinking rather than a snapshot evaluation. Each horizon aligns to a real operational reality.
The 3-month window is the stabilization window. Many properties take time to reach operating rhythm: marketing, pricing, turns, vendor relationships, and tenant experience all get established in the early period. The noise in this window is high and the signal is low, which is why evaluating a property based solely on the first quarter is one of the most common and expensive analytical mistakes.
The 3-year window is the proof-of-model window. Three years is long enough to experience at least a couple of renewal and turnover cycles, to see whether expense patterns match underwriting assumptions, and to evaluate whether your rent strategy aligns with local market conditions. It is also far enough from acquisition to separate what was temporary friction from what reflects the actual economics of the asset.
The 3-decade window is the wealth window. This is where amortization, long-term appreciation, and inflation-adjusted rent growth drive the majority of lifetime returns. Research on single-family rental total returns shows that both income yield and price appreciation contribute meaningfully to long-run performance, and that multi-decade ownership allows those two components to compound in ways that short-term evaluation frameworks simply cannot capture.
Recent market data illustrates why short-term snapshots mislead. National home prices rose 4.5% year-over-year in the FHFA's Q4 2024 House Price Index, a meaningful figure that varies significantly by market and can shift quickly. Rent growth cooled nationally, with Zillow reporting 1.0% year-over-year growth in December 2024 and noting broader cooling tied to new supply. The national rental vacancy rate reached 6.9% in Q4 2024 and 7.2% in Q4 2025. None of these data points tells you whether a specific property is a good investment. The 3-3-3 framework is the mechanism for integrating them across the right time windows.
Start by defining what success means in each window, because the same property can look problematic in one horizon and excellent in another.
For the 3-month horizon, success means reaching target occupancy, confirming market rent, establishing a repair baseline, and verifying that operating expenses are realistic. For the 3-year horizon, success means consistent occupancy near your underwriting assumptions, predictable maintenance and capital expenditure planning, and reliable net operating income trends. For the 3-decade horizon, success means meaningful equity growth through principal paydown and appreciation, combined with rent income that rises with inflation over time.
Write down three metrics you will track for each horizon before running the numbers. Without that commitment, you will gravitate toward whichever metric makes the deal feel right in the moment.
A common underwriting mistake is using one profitability number to represent a property across all time windows. The 3-3-3 Rule asks for three separate scorecards.
The 3-month scorecard covers expected days-to-lease and occupancy ramp, initial repair and turn costs, and cash reserves sufficient to absorb the vacancy buffer that national data suggests should never be assumed away.
The 3-year scorecard covers net operating income trend and expense drift, vacancy and turnover assumptions built on realistic data rather than optimism, and rent growth assumptions informed by current national trends rather than peak-cycle figures.
The 3-decade scorecard covers mortgage amortization and the equity paydown it produces, long-term appreciation using conservative assumptions grounded in indices like the FHFA House Price Index, and inflation context from CPI data that helps separate nominal gains from real purchasing-power improvement.
Keep three separate assumption sets: stabilization, 3-year operations, and 30-year wealth. Pricing a long-term asset like a short-term trade is one of the most reliable paths to disappointment.
The first 90 days are where execution matters most. The goal is not perfection. It is getting to a predictable operating rhythm as efficiently as possible.
Track four things in the first three months: actual rent collected versus projected, vacancy days and leasing funnel performance, maintenance responsiveness and first-wave repair costs, and tenant screening quality as a driver of early stability. Early pain is common and expected. Persistent variance after the stabilization window closes is the real signal to investigate.
Treat months one through three like onboarding a new business unit. If you are not tracking variance between projected and actual performance, you cannot distinguish between a property problem and a process problem.
Three years is long enough to reveal whether you have built a resilient rental rather than a lucky first year. During this window, you typically experience at least two renewal or turnover events. Turnover carries real costs ranging from roughly half a month to several months of rent depending on repairs, vacancy, and leasing expenses. These costs significantly affect whether the operating economics match what you underwrote.
Market rent and rent growth can also change direction over a three-year period. Zillow data confirms that rent growth can slow and decline from peaks, reinforcing the need for medium-term analysis rather than extrapolating from a single favorable year.
By year three, you should be able to measure average annual cash flow and cash-on-cash trend, occupancy and average days-to-lease, maintenance and capital expenditure averages separated into recurring and one-time categories, and the relationship between rent increases and tenant retention rates.
The 3-year mark is a natural decision point because it is far enough from acquisition to reduce noise and early enough to pivot before complacency sets in. Put a calendar reminder at acquisition to run a hold, refinance, or sell analysis at the three-year mark rather than letting it arrive without a plan.
At year three, evaluate whether the asset is stabilized and performing as expected, whether a renovation, rent repositioning, or operational upgrade would meaningfully change net operating income, and whether holding, refinancing, or selling best serves the portfolio. If operational optimizations around expense control and tenant retention have been the primary levers, the year-three decision should also reflect whether those improvements are sustainable or have been fully captured.
The 30-year lens is where rental properties often outperform expectations because time compounds in your favor. It also requires more disciplined modeling than shorter-horizon analysis, because small assumptions about rent growth, vacancy, and appreciation compound into large differences in the projected outcome.
The four key long-horizon drivers are amortization, where tenants effectively help pay down principal over time; appreciation, which FHFA data shows has been positive nationally over multi-decade periods even with year-to-year volatility; rent growth, which should be modeled conservatively against current national trends rather than peak-cycle performance; and vacancy cycles, which national data confirms are never zero and should be built into any 30-year projection.
The 3-3-3 Rule offers a meaningful advantage over popular quick rules like the 1% rule, 2% rule, and 50% expense rule. Those tools are useful for fast screening but blunt as decision frameworks. They do not address stabilization timing, turnover cost, financing structure, or multi-decade wealth building. The 3-3-3 framework forces evaluation across phases rather than a single snapshot, which is how rental properties actually perform.
Your 30-year model should include a conservative rent growth rate, a vacancy allowance grounded in national data, and periodic capital expenditure. If the wealth outcome still meets your goal under those conservative assumptions, the asset is far more likely to deliver.
The 3-3-3 Rule only works if you can measure what matters without drowning in spreadsheets or losing the data between review cycles.
For the 3-month stabilization window, track rent collected versus scheduled, vacancy days, make-ready costs, and maintenance response time. For the 3-year performance window, track cash flow trend, net operating income trend, turnover frequency and cost, and occupancy rate. For the 3-decade wealth window, track equity growth through principal paydown and market value, appreciation in context of indices like the FHFA, and rent projections that are periodically updated to reflect current market reality.
When your metrics are organized by property and by time window, the 3-3-3 Rule stops being a concept and becomes a repeatable decision system.
Use this template for acquisitions you are considering or to evaluate a property you already own. Fill in the projected columns using conservative assumptions before closing, then update with actual results monthly during the first three months, quarterly through year three, and annually thereafter.
3 Months: Stabilization
Target occupancy date. Leasing plan covering marketing channels and showing process. Make-ready budget per unit. First-90-day cash reserve target covering mortgage, utilities, and repairs. KPI targets: collected rent as a percentage of scheduled, vacancy days, and maintenance response time.
3 Years: Proof of Performance
Average annual cash flow target. Occupancy target with a vacancy allowance built in using national data as a floor. Turnover assumption and estimated cost per turnover event. Annual rent increase assumption set conservatively against current market conditions. Year-three decision trigger chosen in advance from the options of hold, optimize, refinance, or sell.
3 Decades: Wealth Building
Long-run rent growth assumption in nominal terms. Inflation assumption for a real return view using CPI as a sanity check. Long-run appreciation assumption contextualized with FHFA trends and kept conservative. Equity milestones at years ten, twenty, and thirty. Lifestyle risk plan covering job loss, major repairs, and market downturns.
If the deal only looks good in one horizon, you now know exactly what risk you are accepting.
Is the 3-3-3 Rule a formal industry standard or a heuristic?
It is best understood as a practical heuristic rather than a formal standard. The time-horizon version covering 3 months, 3 years, and 3 decades is an investor-friendly adaptation that aligns with how rentals actually behave: stabilize first, prove performance next, compound wealth last. The value is in the discipline it creates, not in the authority of its origin.
How does the 3-3-3 Rule compare to the 1% rule, 2% rule, and 50% expense rule?
Those quick rules are screening tools rather than full evaluation frameworks. They help sort listings quickly but can reject good long-term assets or approve risky ones. The 3-3-3 Rule differs because it separates early volatility from stabilized performance, forces realistic vacancy and turnover assumptions into the model, and emphasizes multi-decade wealth drivers that snapshot metrics cannot capture. Use quick rules to shortlist. Use the 3-3-3 framework to decide.
What metrics matter most in each horizon for small landlords?
For 3 months, the most useful metrics are collected rent as a percentage of scheduled rent, vacancy days, make-ready spend, and maintenance turnaround time. For 3 years, track average annual cash flow, occupancy rate, and turnover frequency and cost. For 3 decades, track equity growth, long-run rent projections adjusted for current market conditions, appreciation in context of index data, and inflation-adjusted purchasing power using CPI as a reference.
What if the first 3 months look bad? Does that mean the deal was a mistake?
Not necessarily. The first 90 days often reflect stabilization friction: vacancy during unit turns, one-time repairs, and operational setup. The key distinction is whether the result is explainable and fixable through execution or whether it reflects a structural mismatch between rent and expense that will persist regardless of how well the property is managed. Early pain is common. Persistent variance after stabilization closes is the signal to investigate seriously.
Want to see how Shuk helps landlords track performance across each of these horizons, from first-90-day variance to year-over-year NOI trends? Book a demo and walk through how rent collection, maintenance tracking, and lease renewal tools work together for landlords managing 1 to 100 units.

Vacancy is expensive, and in 2026, weak listing photos are one of the fastest ways to lose qualified renters before they ever schedule a tour. Most prospects decide whether your unit is worth their time in a few seconds of scrolling. If photos feel dark, distorted, cluttered, or inconsistent, renters read it as risk: hidden problems, poor maintenance, or a landlord who will not respond when issues come up.
You do not need a studio budget to produce professional-looking rental photos. You need a repeatable workflow covering prep, lighting, composition, and a clean post-production process that makes your space look bright, accurate, and easy to imagine living in. Industry research consistently shows that better visuals drive more engagement. Zillow reports that listings with 3D Home tours receive 43% more views and 55% more saves, and high-quality images are cited as key to listing performance. On one major marketplace, listings average 33 photos and 69% include at least one 3D tour. If you are under 20 photos or missing a floor plan, you are likely below the market's visual standard before the first renter scrolls past.
This guide breaks property photography down into steps you can execute in one afternoon.
High-performing rental listing photos do three things simultaneously.
They reduce uncertainty by showing a clear layout, natural colors, and honest condition. They increase perceived value through bright and balanced exposure, straight lines, and cohesive rooms. They make next steps easy through a consistent photo order, correct file sizes, and fast-loading images.
Research supports the value of strong visuals. Redfin found professional photos correlated with 118% more online views in a study of home listings. For rentals, marketplace guidance emphasizes that multimedia improves lead quality and that robust photo coverage, commonly around 33 photos, is a baseline expectation rather than a differentiator.
Two quick before and after examples:
Living room: a handheld wide-angle phone shot with tilted verticals makes walls look like they are falling backward. A tripod shot at chest height with corrected verticals instantly reads as well-maintained and accurately proportioned.
Kitchen: mixed warm bulbs combined with daylight create orange and blue color casts that make the space feel cheap. Turning on consistent interior lights, controlling window exposure with bracketing, and setting a consistent white balance produces a clean, modern look with no editing tricks required.
A listing photo set is not art. It is a guided walkthrough. Decide what your photos must accomplish before you shoot a single frame.
Reduce objections by showing closets, parking, laundry, and storage rather than only the attractive angles. Confirm layout with transitional shots that connect rooms from hallway to living area to kitchen. Support pricing by showing finishes, light, and condition clearly so there is no mystery about what justifies the rent.
Build a standard sequence for every vacancy: hero exterior or best interior, living area, kitchen, primary bedroom, bathrooms, secondary rooms, amenities, and exterior and parking. Aim for 15 to 25 photos minimum for small units with larger homes requiring more coverage.
Landlords in online communities consistently report that reorganizing photo order to put the best shots first and adding missing utility and amenity photos reduces low-quality inquiries. Better visual completeness filters out "is this real?" prospects without changing the rent.
Photography amplifies both strengths and flaws. The cheapest upgrade is readiness.
Do first: Replace burnt bulbs and match color temperature where possible. Patch nail holes and touch up scuffs. Straighten vents and outlet covers. Remove clutter including trash cans, cords, shampoo bottles, and countertop appliances.
Stage lightly: Rentals do not need model-home staging. Add one or two simple anchors in empty rooms such as a small rug and lamp, or a bistro table in an eat-in nook. Use neutral linens and towels for bathrooms. Open blinds evenly and clean window glass.
Room-specific examples: In bathrooms, remove all personal items, add a fresh hand towel, close the toilet lid, and wipe mirror edges since fingerprints show clearly on camera. In bedrooms, one crisp duvet and two pillows reads as move-in ready even in an otherwise empty space. In the kitchen, clear counters except for one intentional item such as a small plant so the counter material is visible.
NAR's staging research shows 81% of buyers' agents say staging helps people visualize the property. Rentals benefit from the same psychology at a much lower investment.
You can create excellent rental photos with a modern smartphone if you stabilize it and control exposure.
Smartphone setup: Use the phone's highest resolution and enable HDR if it looks natural. Add a tripod with a simple phone clamp. Consider a Bluetooth remote or timer to avoid camera shake on the shot.
Camera setup: A crop-sensor or full-frame camera with a wide lens produces cleaner edges and less distortion. Professional guidance commonly suggests wide-angle lenses around 12 to 24mm full-frame equivalent while avoiding ultra-wide distortion that misrepresents room size.
If you invest in only one thing, buy a tripod. Stability unlocks low-noise images, sharper detail, and consistent framing that is difficult to achieve any other way.
Two real-world gear examples: A small studio shot with a phone, tripod, window light, and basic editing produces very strong results if lines are straight and exposure is balanced. A large home with dark hallways benefits from a camera on a tripod with bracketed exposures for HDR blending, which saves editing time and improves accuracy.
Lighting is the difference between "dim and cramped" and "bright and clean."
Natural light rules: Shoot when the unit is brightest but not harsh, typically mid-morning or late afternoon depending on window direction. Turn off interior lights if they create heavy orange casts, unless the room becomes too dark without them. The decision depends on color temperature and fixture quality, and many experienced photographers choose whichever approach looks more natural and consistent across rooms.
Mixed light problem: Daylight, which is cool, combined with tungsten bulbs, which are warm, creates ugly color splits that no amount of white balance adjustment can fully fix. Use consistent bulbs of the same color temperature, or prioritize one dominant light source and supplement rather than fight the other.
HDR and exposure bracketing: HDR combines multiple exposures to hold window detail while keeping interiors bright. Bracketing is especially helpful in kitchens and living rooms with bright windows that would otherwise blow out.
Two quick lighting fixes: In a dark bedroom, open blinds fully, place the camera on a tripod, and slightly brighten exposure in editing rather than using high ISO that introduces noise. In a kitchen with bright windows, shoot a bracketed set so cabinets and the window view both look natural in the final image.
Most DIY listing photos fail because of distortion. When vertical lines lean, rooms look warped and untrustworthy, which renters unconsciously associate with problems.
Core standards: Keep the camera level without tilting up or down. Aim for chest height, roughly four to five feet, for most interiors. Use door frames and wall edges as alignment guides during the shot.
Correcting verticals is a foundational concept in real estate photography: straight lines signal professional quality and accurate space representation. Use the gridlines available in nearly every phone camera and align vertical edges to it. This single habit fixes a large percentage of amateur-looking images.
Room-specific composition: In the living room, include two walls for depth rather than a flat one-wall shot. In bathrooms, shoot from the doorway or corner and avoid extreme wide angles that make fixtures look stretched. In the kitchen, show the work triangle of sink, stove, and refrigerator when possible to convey functional layout.
A consistent shot list makes your workflow fast and your listing complete every time.
Living room and common areas, four to six shots: Corner-to-corner to show width. Opposite corner to show flow into dining or kitchen. One feature shot covering a fireplace, built-ins, or view.
Kitchen, three to five shots: Wide from entry. Counter run and appliances. Sink area and any premium finishes.
Bedrooms, two to four shots each: From doorway to show the full room. Closet if it is a strong feature. Window or view if it is an asset.
Bathrooms, two to three shots: Vanity and mirror wiped first. Tub or shower with curtain open and products removed.
Utility and amenities, one to three shots: Laundry, thermostat, parking, storage, and balcony or patio. These photos reduce repetitive questions that consume your time before a showing.
A sequence that performs well: Best hero shot, living room wide, living room toward kitchen, kitchen wide, kitchen detail, primary bedroom, bathroom, secondary bedroom or office, laundry and storage, parking and exterior.
Exterior shots are often the first impression and frequently determine whether a renter decides the unit feels safe, convenient, and cared for.
Must-have exterior shots: Front of building or home with both a straight-on and slight angle view. Entry path and door to help renters recognize the location at showing time. Parking area and any signage. Outdoor amenities including yard, patio, balcony, or pool if included in the rental.
Timing tips: Avoid harsh midday shadows when possible. Golden hour adds warmth and depth without misrepresenting color, and the light is available at no additional cost.
Context-specific examples: For small multifamily buildings, photograph the specific entrance and mailbox area to reduce day-one confusion during tours. For single-family rentals, include a wide shot that shows driveway length as a practical detail renters want to know. For urban units, capture the building facade and lobby or entry system if it is a selling point.
If the exterior is weak due to construction nearby or tight street parking, photograph it honestly but lead with your strongest interior hero image. Transparency reduces cancellations and negative showing experiences.
Editing should make the photo look like the unit on its best day, not a different unit.
Basic edits that almost always help: Lift exposure and contrast gently to open shadows. Correct white balance to neutralize orange or blue casts. Correct verticals and perspective. Crop slightly for cleaner framing.
Over-editing can create compliance risk and tenant distrust. Edits that materially misrepresent size, condition, or permanent features are problematic both ethically and practically since they generate showings that end in disappointment and wasted time.
Two editing examples: In a window-heavy living room, use an HDR blend to keep the window view from blowing out while keeping the sofa area visible. In a warm bathroom, adjust white balance so tile looks white rather than yellow, then reduce highlights to keep fixture detail.
Compliance note: Removing a temporary item like a trash can that will not be there when the tenant moves in is generally fine. Removing permanent damage without repairing it is misleading. Be consistent in what you edit out versus what you show.
Even great photos can look bad if they are uploaded incorrectly or load slowly.
Recommended specs: Zillow guidance recommends high-quality uploads, and most real-estate photo workflows target approximately 2048 pixels on the long edge for compatibility and speed. Apartments.com commonly references 2048 pixels on the longest side as a strong standard. Facebook Marketplace performs best with square images around 1200 by 1200 pixels or higher.
Practical workflow: Export a master set at 4:3 ratio, which is a common interior ratio, at 2048 pixels on the long edge. Create a second set cropped square for Marketplace if you rely on that channel. Name files logically, for example 123Main_Unit2_Living01.jpg, so the property and room are identifiable in your records.
Upload order matters. Put your best three to five photos first covering hero shot, main living area, and kitchen. Some platforms show only a few images in preview, so the strongest shots must lead.
When listings underperform, photos usually contain one of these issues.
Too few photos: Hit a minimum set and cover all amenities. Marketplace guidance consistently emphasizes multimedia's role in lead quality and engagement. Aiming for 25 to 40 photos is appropriate for most rentals.
Distorted wide angles: Step back into doorways, keep the camera level, and avoid ultra-wide settings that make rooms look artificially large or warped.
Inconsistent color: Standardize bulb color temperature and correct white balance in editing to produce a consistent look across all rooms.
Messy or occupied feel: Remove toiletries, piles of clothing, and sensitive documents. Keep staging neutral so renters can visualize their own belongings in the space.
Two quick rescue scenarios: For an occupied unit you cannot fully stage, focus on angles that minimize clutter by shooting tighter and prioritize clean areas such as the kitchen wide shot and the bedroom from the doorway. For a very small room, use a doorway shot plus one opposite corner shot rather than extreme wide angles. Accuracy beats false spaciousness every time.
Pre-shoot, 30 to 90 minutes: All lights working with bulbs matched where possible. Windows cleaned, blinds even, curtains straight. Counters cleared in kitchen and bathrooms with cords tucked. Beds made with neutral linens and floors vacuumed or mopped. Toiletries removed, toilet lid down, mirrors wiped. Repairs complete including patch and scuff touch-ups and loose hardware tightened. Identifiable items removed including mail, photos, and tenant information.
Gear and settings, five minutes: Phone or camera charged with lens cleaned. Tripod set and gridlines on. HDR enabled if it looks natural, or bracketing enabled for HDR workflow. Camera level with verticals straight.
Shot list, 15 to 45 minutes depending on size: Hero shot as the best exterior or best interior. Living room with two to three angles plus a feature. Kitchen with a wide shot and two supporting angles. Bedrooms with a doorway shot and optional closet. Bathrooms covering vanity and shower or tub. Laundry, storage, parking, and patio as applicable. Exterior entry and building context.
Post-production and export, 20 to 60 minutes: Brighten exposure and correct color casts. Straighten verticals. Keep edits truthful with no adding or removing permanent features. Export at approximately 2048 pixels on the long edge. Name files logically and upload best images first. Create square crops if prioritizing Marketplace distribution.
AI-Assisted Description Prompt (to pair with photos):
"Write a Fair Housing-compliant rental listing description. Unit facts: [bed/bath/sqft/floor], [location area], [laundry], [parking], [pet policy], [utilities included], [deposit and fees], [availability date], [key features]. Output: two-sentence opener, feature bullets, costs and terms block, how-to-tour call to action. Do not mention ideal tenant types."
Do I need a professional camera to get professional-looking rental photos?
No. A modern smartphone produces excellent results when used with a tripod, kept level, and paired with HDR or bracketing to control dynamic range when needed. The professional look comes from straight verticals, clean staging, and consistent color rather than expensive gear.
How many photos should I upload for a rental listing?
Aim for at least 15 to 25 for most rentals and add amenity and exterior photos beyond that. High-performing listings on major marketplaces commonly provide extensive coverage of around 33 photos. If you post only five to eight images, you force renters to guess and they often move on rather than inquire.
Should I edit photos to make rooms look bigger?
Correcting perspective by straightening vertical lines is good practice that improves clarity and accuracy. Using extreme wide angles or heavy edits that materially change proportions can be misleading and generates showing appointments that end in disappointment. The better approach is accurate wide framing from corners and doorways combined with bright, balanced exposure.
Can tenants be present during the photo shoot?
They can, but it often slows the process and increases privacy risk. If the unit is occupied, ask tenants to remove personal items and sensitive documents from visible areas in advance. Avoid capturing people in photos. Focus on the space itself with neutral staging so the photos serve future renters rather than documenting the current occupancy.
Once you have captured a clean and complete photo set, the next step is distribution and consistency: uploading the right images in the right order with the right specifications every time so your listing looks professional wherever renters find it.
Book a demo to see how Shuk's listing workflow, multi-marketplace syndication, and AI description generator help you publish faster and more consistently so your photos do not just look better but get seen by more qualified renters sooner.