Rental Management Guides

The End-to-End Workflow for Independent Landlords and Property Managers With 1 to 100 Units

Managing rental properties is not one task—it is a system. Tenant onboarding, rent collection, maintenance, compliance, communication, and financial tracking all influence each other. When these workflows are handled through scattered tools, even experienced landlords feel operational friction.
This Rental Management Guides hub is the central learning destination for landlords and small to mid-size property managers who want to simplify operations, reduce risk, and manage rentals more professionally. Each guide below focuses on a specific part of property management, while this page ties them together into a complete operating framework.

QUICK VIEW
Stop Reacting to Vacancies. Start Seeing Them Coming.

Shuk helps landlords and property managers get ahead of vacancies, improve renewal visibility, and bring more predictability to every lease cycle.

Book a demo to get started with a free trial.

Stay in the Shuk Loop

Rental Management Guides: How to Manage a Rental Property End to End

Rental property management is the set of repeatable systems a landlord uses to protect income, maintain property condition, and stay legally compliant across the full tenant lifecycle. For independent landlords managing 1 to 100 units, the challenge is not understanding what needs to be done. It is doing it consistently, without staff support, often after hours, while balancing rising operating costs and a competitive rental market.

New to managing rentals? Start with Getting Started as a Landlord to understand the first 90 days of setting up your systems, tenant processes, and lease workflows.

This hub organizes the entire rental management workflow into eight clusters covering every phase of operations. Each cluster connects to focused spoke guides covering the specific tasks, tools, and decisions within that phase.

Rental management works best when landlords treat it as a connected system rather than a series of separate tasks. New property owners usually begin by getting started as a landlord, then build stronger leasing processes with lease management basics, improve payment workflows through rent collection strategies, and reduce turnover through effective lease renewal management. As operations grow, landlords also need better tenant communication strategies and a practical rental property maintenance guide to keep everything organized across the full rental lifecycle.

Why Consistency Is the Core Problem in Rental Management

Most landlord problems do not start as big mistakes. They start as small documentation gaps, informal agreements, or inconsistent processes that compound over time into expensive disputes, cash flow disruptions, or legal exposure.

A tenant who pays late once and receives a firm, documented notice is unlikely to repeat the pattern. A tenant who pays late and receives an inconsistent response learns that the policy is negotiable. A move-in inspection done with timestamped photos and a signed checklist resolves most deposit disputes before they escalate. A move-in done informally, with nothing documented, turns a normal disagreement into an expensive argument.

The operational goal of this hub is straightforward: replace reactive, ad-hoc management with repeatable workflows that deliver professional-level consistency regardless of how many units you manage.

Eight Rental Management Clusters

Cluster A. Getting Started: Build the Foundation Before You Need It

Most landlords learn rental management by reacting to problems as they arise. The landlords who run the least stressful portfolios built their systems before the problems showed up. Getting started the right way means defining your standards, setting up your workflows, and understanding your legal obligations before your first tenant asks a question you were not prepared to answer.

What to build first:

  • A one-page rental standards document covering income requirements, pet policy, maintenance response targets, and quiet hours. Use it to stay consistent across every applicant.
  • A recurring calendar for filter changes, smoke and CO detector checks, lease renewal windows, and seasonal inspections.
  • A single storage system for all critical records: applications, leases, condition photos, payment ledgers, and notices.

See the guides in this cluster below for step-by-step walkthroughs of each foundation area.

Cluster B. Leasing and Screening: Create Clarity Before the Tenancy Begins

The lease and the screening process set the terms for everything that follows. Weak leases create ambiguous situations. Inconsistent screening creates legal exposure. A strong leasing and screening process documents your criteria, applies them the same way to every applicant, and ensures every tenant starts the tenancy with clear expectations around payment, maintenance, and policy. This is general operational guidance, not legal advice. Consult local counsel for jurisdiction-specific requirements.

What to prioritize:

  • Publish your screening criteria before accepting applications. This reduces disputes and signals to qualified applicants that you run a professional operation.
  • Use a lease that covers the terms landlords most commonly dispute: late fees, maintenance response expectations, renewal notice periods, and deposit deduction standards.
  • Document every decision with a consistent, neutral paper trail.

See the guides in this cluster below for lease structure, screening criteria, and approval workflows.

Cluster C. Marketing and Tenant Pipeline: Reduce Vacancy Days Before They Start

Vacancy is where returns disappear. The national rental vacancy rate reached 6.9% in Q4 2024, and local competition for qualified tenants moves faster than most landlords expect. The most effective approach to vacancy reduction is not waiting until a unit is empty to start marketing. It is maintaining a continuous presence in your market and a warm pipeline of interested prospective tenants before you need them.

What to prioritize:

  • Treat your listing like a sales page. Lead with the three to five features your ideal tenant cares about: parking, in-unit laundry, transit access, pet policy, and included utilities.
  • Track lead response time. Landlords who respond within a few hours win significantly more showings, especially for entry-level units.
  • Build a pipeline before vacancy hits so you are not starting from zero when a tenant gives notice.

See the guides in this cluster below for listing strategy, marketing channels, and pipeline building.

Cluster D. Rent Collection: Get Paid on Time and Enforce Policy Consistently

Cash flow is oxygen. When rent collection is manual, you spend more time chasing money and have less clarity on portfolio performance. Online rent collection is no longer a niche preference: 73% of renters prefer paying rent through online platforms. The operational benefit is fewer late payment conversations, automatic receipts, and cleaner bookkeeping. But the system only works if your policy is clear, written into the lease, and enforced the same way every month.

What to set up:

  • A single rent policy covering the due date, grace period if applicable, late fees, and how notices are delivered. Write it into the lease and enforce it identically every time.
  • Online payment with autopay as the default option presented at lease signing.
  • A documented escalation process from reminder to late notice to formal action, so you never improvise under pressure.

See the guides in this cluster below for collection setup, late payment workflows, and policy enforcement.

Cluster E. Maintenance and Repairs: Control Costs with Process

Maintenance is where profits are won or lost, and costs have risen sharply. Median repairs and maintenance expenses increased 46% between 2018 and 2022. Even small portfolios feel the same inflation and labor pressures as larger operators. The solution is not spending less. It is spending more deliberately through preventive scheduling, clear vendor expectations, and a triage system that distinguishes emergencies from routine work.

The recommended workflow:

  • Use a triage system: emergency issues same day, urgent issues within 24 to 48 hours, routine issues on a scheduled basis.
  • Route all maintenance requests through one intake channel that captures photos, timestamps, and unit information.
  • Schedule seasonal preventive maintenance to catch problems before they become emergencies.

See the guides in this cluster below for maintenance planning, work order management, and vendor coordination.

Cluster F. Renewals and Tenant Communication: Protect Revenue and Reduce Churn

Turnover is expensive. You lose rent during vacancy, pay for make-ready costs, and spend time marketing and screening again. Keeping a quality tenant is almost always cheaper than replacing one. The most effective renewals are initiated early, offered transparently, and supported by a track record of responsive communication throughout the tenancy. Tenants who feel heard and responded to are significantly more likely to renew.

What to do 90 to 120 days before lease end:

  • Start renewal conversations well before the lease end date based on your local rules and leasing season.
  • Offer options: a 12-month renewal, month-to-month at a higher rate, or a longer term with a smaller annual increase.
  • Review your communication responsiveness throughout the lease. Fast maintenance response and clear communication reduce churn more reliably than rent concessions.

See the guides in this cluster below for renewal timelines, rent increase communication, and retention strategy.

Cluster G. Financial Reporting and Tax Preparation: Know Your Numbers Before You Need Them

Many small landlords operate on bank-balance management. If there is money in the account, things feel fine. But profitability depends on vacancy days, turnover costs, maintenance spend, and bad debt. Without clean records, it is hard to know whether raising rent, deferring upgrades, or adjusting screening standards is the right move. At tax time, disorganized records translate directly into missed deductions and higher accountant fees.

What to track monthly:

  • Income and expenses per property, not per portfolio. Blended numbers hide underperforming units.
  • Maintenance spend as a percentage of rent. A spike in one property is a signal worth investigating before it compounds.
  • Three key metrics each quarter: collected rent percentage, delinquency rate, and turnover cost per unit.

See the guides in this cluster below for financial reporting, expense tracking, and tax preparation.

Cluster H. Landlord Reputation and Two-Way Reviews: Stand Out as a Quality Operator

Most renters know more about their five-minute rideshare driver than their 12-month landlord. Great landlords and poor landlords currently look the same to prospective tenants because there is no standard way to signal service quality. Two-way review systems change that. They give quality landlords a way to build a verifiable reputation that supports premium positioning and attracts better-qualified tenants over time.

Why reputation management matters:

  • Landlords with documented positive track records attract stronger applicant pools and face less resistance to reasonable rent increases.
  • Two-way reviews create accountability on both sides of the rental relationship, which improves behavior across the full tenancy.
  • A managed reputation reduces the impact of isolated negative experiences by providing context and demonstrating consistent responsiveness.

See the guides in this cluster below for reputation building and two-way review systems.

{

  "@context": "https://schema.org",

  "@type": "FAQPage",

  "mainEntity": [

    {

      "@type": "Question",

      "name": "What are rental management guides?",

      "acceptedAnswer": {

        "@type": "Answer",

        "text": "Rental management guides explain how landlords can manage tenants, rent, maintenance, compliance, and finances using structured systems and tools."

      }

    },

    {

      "@type": "Question",

      "name": "Who should use rental management guides?",

      "acceptedAnswer": {

        "@type": "Answer",

        "text": "These guides are designed for independent landlords and small property managers managing residential rental properties."

      }

    },

    {

      "@type": "Question",

      "name": "Which rental management task should be automated first?",

      "acceptedAnswer": {

        "@type": "Answer",

        "text": "Most landlords benefit most from automating rent collection and maintenance workflows first."

      }

    },

    {

      "@type": "Question",

      "name": "Do rental management guides replace legal advice?",

      "acceptedAnswer": {

        "@type": "Answer",

        "text": "No. Rental management guides focus on operational best practices and documentation, not legal interpretation."

      }

    }

  ]

}

Stop Reacting to Vacancies. Start Seeing Them Coming.

Shuk helps landlords and property managers get ahead of vacancies, improve renewal visibility, and bring more predictability to every lease cycle.

Book a demo to get started with a free trial.

Stay in the Shuk Loop

Learn Hub: Rental Management Guides Guides

Rental property management is the set of repeatable systems a landlord uses to protect income, maintain property condition, and stay legally compliant across the full tenant lifecycle. For independent landlords and property managers with 1 to 100 units, the challenge is not understanding what needs to be done. It is doing it consistently, without staff support, often after hours, while balancing rising operating costs and a competitive rental market. This hub organizes the entire rental management workflow into eight clusters covering every phase of operations, from getting started and screening tenants through rent collection, maintenance, renewals, financial reporting, and reputation management.

Rental Management Guides
How to Handle Tenant Turnover: A Step-by-Step Checklist to Cut Vacancy Days and Protect Your Property

How to Handle Tenant Turnover: A Step-by-Step Checklist to Cut Vacancy Days and Protect Your Property

Tenant turnover is where rental income and property condition are won or lost. One move-out can trigger a chain reaction: unclear notice dates, missed inspection opportunities, deposit disputes, delayed vendors, stale listings, and ultimately extra vacancy days you cannot get back.

Those empty days are not theoretical. Industry reporting breaks down turnover costs as a mix of hard expenses covering cleaning, paint, repairs, lock changes, and flooring, and soft costs especially lost rent, which can represent 35% to 50% of total turnover expense. When you add it up, turnover commonly lands anywhere from $1,000 to $5,000 per move-out depending on unit condition and market, and one analysis pegged average turnover at approximately $3,872 per resident.

The other challenge is time. Even if your make-ready only takes two weeks, the end-to-end vacant-to-leased period can stretch longer when you factor in marketing, showings, screening, and lease signing. Recent analytics showed average vacant days climbing to 34.4 days by the end of 2024. For independent landlords and small property managers, that is a painful drag on cash flow, especially when you are juggling maintenance coordination, compliance deadlines, and tenant communications across text threads and spreadsheets.

This playbook is designed to turn turnover into a repeatable system. You will get an end-to-end checklist from move-out notice through move-in onboarding with practical timelines, legal guardrails especially around security deposits, and efficiency tactics that reduce vacancy days while protecting the asset.

Why Turnover Deserves a System, Not Just a To-Do List

Turnover is unavoidable. Preventable chaos is not. Here is what you are protecting with a disciplined process: revenue continuity through minimized vacancy days and lost rent, asset value through consistent standards in cleaning, paint, repairs, and preventive maintenance, and legal compliance especially around deposits, notices, and documentation.

Vacancy time has expanded in many markets. General operational targets often aim for 20 to 30 vacant days for typical properties while market-wide averages can rise above a month. If you wait to market until the unit is empty, start calling vendors after keys are returned, and assemble deposit documentation at the last minute, you are choosing a longer downtime.

This guide walks you through a practical turnover workflow in ten steps matching the real sequence you experience: move-out notifications and confirmation, pre-move-out instructions and scheduling, inspections with photos, security deposit reconciliation and state deadlines, repairs and cleaning and make-ready planning, preventive maintenance upgrades, marketing and re-listing, tenant screening and selection, lease signing and compliance documentation, and move-in onboarding that prevents the next turnover.

Adopt even half of this system and you will reduce friction, create a consistent resident experience, and build a turnover engine that scales from one unit to one hundred without burning you out.

Ten Steps to Reduce Vacancy Days and Protect Your Property

Step 1. Confirm Notice, Lease End Date, and Local Requirements

Start the turnover the moment you receive notice because every day you delay planning becomes vacancy later. Verify the lease end date, the required notice period, and how notice must be delivered whether by email, written letter, or portal. Month-to-month notice is commonly 30 days but can vary by state and circumstance. California can require 30 or 60 days depending on length of tenancy. In Texas, month-to-month is generally tied to one rental period of approximately 30 days.

What to do: Send a written notice-received confirmation that includes the tenant's confirmed move-out date and time, a forwarding address request which is critical for deposit mail in some states, and a timeline of inspections, utilities, and key return.

Use templates and automated reminders so you are not rewriting the same messages every turnover. Centralizing dates in one calendar covering notice received, pre-inspection, move-out, and deposit deadline reduces missed deadlines and he-said-she-said disputes.

Step 2. Send a Pre-Move-Out Instruction Pack

A clean, consistent move-out process protects your unit and your deposit accounting. Within 24 to 48 hours of notice, send a move-out instruction pack covering cleaning expectations for appliances, bathrooms, floors, and trash removal; what counts as normal wear versus tenant-caused damage with defined examples; rules for patching holes, nail removal, and paint touch-ups if you allow tenant repairs; how to return keys, garage openers, and fobs; and utility transfer requirements.

This step reduces your make-ready scope and speeds listing photo readiness. Turnover cost analyses consistently include cleaning, painting, and junk removal as major line items. If your tenant understands standards early, you are more likely to avoid paying for avoidable labor.

A practical 48-hour countdown to include in your message: At T-minus 48 hours, confirm elevator reservation if applicable and final walkthrough appointment. At T-minus 24 hours, remove all belongings, wipe down appliances, and bag trash. On move-out day, take photos, drop keys, and record meter reads if relevant.

Also schedule a pre-move-out walkthrough where allowed. It reduces conflict by aligning on what will be billed before there is a dispute rather than after.

Step 3. Pre-Inspection and Early Scope of Work

If your state and local rules allow, do a pre-move-out inspection one to two weeks before the tenant leaves. The point is not to nitpick. It is to identify safety issues or major repairs that will block leasing, pre-order materials including paint, blinds, filters, and smoke and CO batteries, and get vendor bids scheduled so day one after move-out is productive rather than spent making calls.

Industry estimates place make-ready costs anywhere from $400 to $5,000 or more depending on condition. The earlier you define your scope of work, the more you can keep costs toward the low end.

A standardized inspection rubric with lease-ready minimums: All lights working with covers intact. No active leaks and drains clear. Appliances functional. Doors and locks operating smoothly. Walls with a patch, sand, and paint plan. Floors with a clean, repair, or replace plan.

Create tasks directly from inspection results and assign them to staff or vendors with due dates so nothing exists only in your head.

Step 4. Move-Out Day: Document Condition Like It Is Evidence, Because It Is

Your move-out inspection should be consistent, photo-rich, and time-stamped. Photograph each room from multiple angles, close-ups of damage covering chips, stains, holes, and broken fixtures, appliances inside and out, floors and baseboards, outdoor areas including patio and yard condition, and keys and fobs returned with a count recorded.

This documentation directly supports deposit deductions and protects you if disputes escalate. Many state deposit statutes require an itemized statement of deductions within a specific deadline window often alongside the refund. Photos combined with an inspection checklist make your itemization far easier to justify and far harder to dispute.

Complete the inspection immediately after possession returns when keys are surrendered to avoid ambiguity about post-move damage. If you allow early key return, document the exact surrender date and time in writing.

Also initiate lock changes and re-key immediately after move-out. Lock changes are a standard line item in turnover cost breakdowns and a safety expectation for professional operations.

Step 5. Security Deposit Reconciliation: Meet Deadlines, Itemize Correctly, and Avoid Penalties

Deposit handling is where small process errors can become expensive. Many states require deposit return within 14 to 60 days and several impose strict penalties for late or incorrect handling.

State-specific timelines to know:

California requires return within 21 days with itemized deductions and potential penalties up to two times the deposit for bad-faith retention.

Texas requires refund within 30 days after surrender, often tied to receiving a forwarding address, with bad-faith penalties that can include $100 plus triple damages plus attorney fees.

Florida requires return within 15 days if no deductions are taken. If claiming deductions, written notice must be sent within 30 days and the tenant has 15 days to object. Missing the notice can forfeit the right to withhold.

New York requires return within 14 days with an itemized statement, and missing the deadline can forfeit the right to keep any portion.

Illinois timelines vary based on whether deductions are taken, typically requiring itemization within 30 days and return of the remainder within 45 days.

Best practice workflow: Export the rent ledger and confirm the balance covering rent, fees, utilities, and damages. Separate wear-and-tear from chargeable damage consistently. Attach invoices and receipts when required or when deductions are substantial. Send the itemization and refund via a trackable method. Deadline tracking, templated itemization letters, attachment storage, and recorded delivery reduce legal exposure significantly.

Step 6. Build a 7 to 14 Day Make-Ready Plan With a Day-Zero Vendor Schedule

Treat make-ready like a project plan rather than a to-do list. Your edge comes from scheduling vendors before the unit is empty rather than after move-out.

Example: a three-day repaint schedule that is tight but realistic with proper preparation.

Day zero, the move-out afternoon: patch and sand, clean walls, tape and cover surfaces.

Day one: prime plus first coat with a two-person crew.

Day two: second coat plus trim and door touch-ups.

Day three morning: walkthrough plus punch-list fixes with photos taken the same afternoon.

Pair this with parallel rather than sequential tasks: Schedule the cleaner immediately after paint cures. Have the flooring vendor on standby for spot repairs. Have maintenance handle smoke and CO batteries, HVAC filter, caulk, and fixtures while paint dries.

Because lost rent is often the biggest turnover expense component, shaving even a week off downtime can materially change your annual return on investment.

Step 7. Do Not Skip Preventive Maintenance

Turnover is the best time to do preventive work with minimal resident disruption. Industry maintenance ROI summaries cite findings that preventive maintenance can deliver a 545% return over 25 years and significantly reduce long-run repair costs. Even if your holding period is shorter, the principle holds: preventive maintenance reduces emergency calls, protects your unit, and helps retain the next tenant longer.

High-impact turnover preventive maintenance items: HVAC service plus filter standardization. Water heater inspection covering leaks, the pan, and straps where applicable. Replacement of worn supply lines in bathrooms and kitchens. GFCI testing and outlet and plate replacement. Door weatherstripping to reduce drafts and complaints. Deep cleaning of dryer vents to reduce risk and improve performance.

Create a turnover PM kit per unit type, such as one-bedroom or two-bedroom, with standard parts. Standardization saves time and reduces vendor dependency.

Step 8. Market Early, Keep Listing Visibility Continuous, and Price With Data

Marketing should start while the unit is still occupied if your local rules and tenant privacy considerations allow showings with proper notice. This continuous visibility reduces dead time between make-ready completion and lease signing. General benchmarks suggest aiming for 20 to 30 vacant days, but recent market data showed averages above that, making early marketing a competitive necessity.

What reduces vacancy days: Pre-schedule photography for day one or two after make-ready. Create a listing template with swap fields for rent, deposit, and availability date. Use a showing calendar to batch tours and reduce back-and-forth scheduling. Post a coming-soon notice with an accurate availability date and avoid bait-and-switch situations.

Mini math example: If rent is $2,100 per month, that is approximately $70 per day in gross rent. A make-ready plus leasing delay that extends vacancy from 14 days to 34 days adds approximately 20 days, or approximately $1,400 in gross rent not collected. That is before utilities, yard care, or additional marketing, reinforcing why lost rent dominates turnover costs.

Step 9. Screening: Standardize Criteria, Document Decisions, and Reduce Fair Housing Risk

A rushed screening decision can create the worst kind of savings: a short vacancy followed by late payments, property damage, or another turnover. Build a consistent process covering written screening criteria for income, credit, and rental history; the same application steps for every applicant; and documented adverse action where required in compliance with local rules.

A practical service-level agreement for yourself: Applications reviewed within 24 hours. Verification calls completed within 48 hours. Approval or decline decision communicated within 72 hours.

This matters because turnover already costs thousands per move-out. Avoid compounding the problem with preventable resident churn. Centralizing applications, storing consent forms, tracking communications, and keeping an audit trail is useful if decisions are questioned later.

Step 10. Lease Signing and Move-In Onboarding: Reduce Future Turnover Before Day One

Lease signing is not the finish line. Onboarding is where you prevent the next turnover. Your goals are to set expectations around maintenance reporting, noise, pets, and parking; make rent payment easy and consistent; and capture baseline condition documentation before disputes can arise.

Move-in best practices: Collect funds for first month and deposit as cleared payment before handing keys. Provide a move-in checklist with photo instructions. Confirm how to submit maintenance requests and what constitutes an emergency. Deliver care and cleaning guidance for countertops, floors, and HVAC filters.

Less friction translates into fewer late payments, fewer misunderstandings, and better retention, lowering the turnover frequency that drives those $1,000 to $5,000 move-out costs.

Vacancy Cost Comparison: Reactive vs. Proactive Turnover

Reactive turnover: Market late, vendors scheduled after move-out, no standardized checklist. Approximately 34 vacant days at $70 per day equals approximately $2,380 in gross rent lost.

Proactive turnover: Market early, vendors pre-booked, standardized checklist applied. Approximately 18 vacant days at $70 per day equals approximately $1,260 in gross rent lost.

Difference: Approximately 16 days and approximately $1,120 saved, not including reduced make-ready expenses from early standards communication or reduced legal risk from tracked deposit deadlines.

Tenant Turnover Checklist

A. Notice and planning: Receive written notice and confirm move-out date and time in writing. Verify lease end date and required notice period for your state and local jurisdiction. Request forwarding address for deposit return. Send move-out instruction pack and cleaning standards. Schedule pre-move-out walkthrough if permitted. Pre-book vendors for paint, cleaning, flooring, and handyman with day-zero and day-one slots reserved.

B. Inspections and documentation: Prepare inspection rubric and photo checklist. Conduct move-out inspection immediately after surrender. Take time-stamped photos and video of every room plus close-ups of all damage. Record key and fob count returned and schedule re-key and lock change. Capture meter reads and utility status if applicable.

C. Deposit and compliance: Reconcile ledger covering rent, fees, and utilities balance. Separate wear-and-tear from chargeable damage. Collect vendor invoices and receipts for deductions where required. Send itemized statement and refund within your state deadline with delivery tracked.

D. Make-ready execution: Finalize scope of work and budget covering materials, labor, and contingency. Complete repairs affecting safety and habitability first. Execute paint plan covering patch, prime, and coats. Schedule deep clean after dust-producing work. Replace consumables including filters, bulbs, and batteries and test smoke and CO devices. Complete preventive maintenance covering HVAC, plumbing checks, caulk, and GFCIs. Conduct quality-control walkthrough and punch list.

E. Re-listing and leasing: Update photos and listing description using a template. Set an accurate coming-soon or available date. Schedule showings in batches and follow up with applicants within 24 hours. Apply screening criteria consistently and document decisions. Issue lease, obtain signatures, and collect funds as cleared payment.

F. Move-in onboarding: Provide move-in checklist with photo instructions. Confirm maintenance request process and emergency protocol. Provide rules covering trash, parking, pets, and noise. Deliver keys and fobs and confirm receipt in writing. Schedule optional 30-day check-in to address early issues before they escalate.

Frequently Asked Questions

How long should tenant turnover take from move-out to new move-in?

There is no single national standard because vacancy time includes both make-ready and leasing time. Some operators report make-ready completion in roughly two weeks with leasing under three additional weeks, while broader analytics recorded 34.4 average vacant days by the end of 2024. You cannot control every market factor, but you can control your workflow. Pre-scheduling vendors, marketing early where allowed, and standardizing screening timelines are the most reliable ways to compress downtime toward a 15 to 30 day target range. If your average is consistently above a month, start by tracking where time is actually spent: waiting on bids, waiting on cleaners, slow applicant follow-up, or delayed listing photos.

What can I legally deduct from a security deposit?

Generally, and state rules vary significantly, you can deduct for unpaid rent and fees and for tenant-caused damages beyond normal wear and tear, supported by an itemized statement and documentation. New York requires return and itemization within 14 days. Florida distinguishes between no-deduction returns within 15 days and deduction claims requiring notice within 30 days. California requires return within 21 days and may require receipts depending on deduction amount. Because penalties can include forfeiture of withholding rights or statutory damages, treat deposit handling like compliance work with consistent inspection photos, clear invoices, and deadline tracking.

Should I renovate during turnover or just do minimum make-ready?

It depends on rent upside and your holding strategy, but do not confuse minimum make-ready with no preventive maintenance. Lost rent can represent 35% to 50% of total turnover cost, so prolonged renovations can erase returns if they extend vacancy too far. A balanced approach is lease-ready now plus preventive maintenance always. Use turnover for fast, high-impact work including paint refresh, fixture swaps, and hardware standardization alongside preventive items that reduce future emergencies. If you are considering a bigger upgrade, run the math: added rent times expected tenancy length minus renovation cost minus additional vacancy days.

How do I reduce turnover time if I only manage a few units and do not have staff?

Your advantage is agility if you build a repeatable system. Start by templating everything: notice confirmation, move-out instructions, inspection rubric, deposit itemization letter, listing description, and screening criteria. Next, pre-build a vendor bench covering painter, cleaner, and handyman and keep turn slots reserved each month. Turnover costs commonly land in the $1,000 to $5,000 range and average vacancy days can exceed a month, so even a small reduction in downtime is meaningful cash flow. If you are overwhelmed, an all-in-one management platform is often the simplest operational upgrade: one place for leasing, screening, e-signatures, payments, maintenance, and document storage.

If tenant turnover feels stressful, it is usually not because you do not know what to do. It is because the process is spread across too many tools, too many messages, and too many mental reminders. The checklist above works best when it is operationalized so tasks generate automatically when notice is received, deposit deadlines are tracked by state, vendors and inspections are scheduled from a single calendar, listings publish quickly, applications flow into one screening pipeline, and all documentation is stored in one place.

Book a demo to see how Shuk's turnover tools work, including task templates, automated reminders, centralized documents, leasing and screening pipeline, and move-in onboarding workflows, so your next turnover is the last one you manage through scattered notes and last-minute scrambling.

Rental Management Guides
Insurance for Rental Properties: The Coverages Landlords Actually Need and How to Choose the Right Limits

Insurance for Rental Properties: The Coverages Landlords Actually Need and How to Choose the Right Limits

You can screen tenants carefully, maintain the property, and collect deposits and still take a six-figure hit from one loss your policy does not fully cover. The most common reason is not bad luck. It is mismatched insurance.

Many self-managing landlords unknowingly buy the wrong form, often a homeowners policy designed for owner-occupied homes rather than tenant-occupied rentals. Others choose limits based on purchase price instead of rebuild cost, or skip the endorsements that seem small until a real claim arrives. A burst pipe that forces your tenants out for eight weeks can erase a year of profit if your loss-of-rent coverage is too low or does not apply. A slip-and-fall on icy steps can turn into a lawsuit where defense costs alone become the main financial threat, especially if you carry minimal liability limits. And if your rental sits vacant during turnover, some policies sharply restrict coverage after a set period unless you plan ahead.

This guide covers which coverages actually protect a rental, which default policy features are often missing, and how to pick limits using a framework tied to rebuild cost, rent, local hazards, and your net worth. You will also get real cost benchmarks so you can sanity-check quotes in today's higher-priced market.

What You Will Learn and Why It Matters

Landlord insurance is not one thing. It is a bundle of decisions. At the center is a Dwelling Property policy form, often called DP-1, DP-2, or DP-3. The form you choose controls how losses are covered, either named perils or open perils, while the limits you choose control how much the insurer may pay. The DP-3 Special Form is commonly viewed as the most robust: it generally provides open-perils coverage for the dwelling and other structures, while personal property is typically covered on a named-perils basis. Importantly, liability is not automatic in the DP-3 form. You add it.

The six core building blocks of a landlord policy: Coverage A for the dwelling, Coverage B for other structures, Coverage C for landlord personal property, Coverage D for loss of rent and fair rental value, Coverage E for liability, and Medical Payments for smaller injuries. Each one is a separate decision, not a default.

By the end of this guide you will have a decision framework you can reuse for every property: select the right policy form, set limits based on your actual exposure rather than the purchase price, close the common gaps with endorsements, and stack liability properly with an umbrella when it makes sense.

The Eight-Step Landlord Insurance Decision Framework

Step 1. Start With the Right Policy Form: DP-1 vs. DP-2 vs. DP-3

The form determines whether you are covered for a short list of named perils, which is more restrictive, or a broader open-perils approach, which is more protective. The DP-3 Special Form generally provides open-perils coverage for the dwelling and other structures, meaning a loss is covered unless it is specifically excluded, while personal property coverage is typically named-perils.

If your goal is fewer claim disputes about cause of loss, DP-3 is usually the cleanest starting point assuming it is available for your property and insurer appetite. Named-peril forms can still be appropriate for low-value properties or when the market pushes you there, but understand what you are trading away: more situations where you may have damage yet no covered peril.

Real-world example: A tenant reports staining on the ceiling after a heavy rain. With an open-perils approach on the dwelling, you are often starting from "covered unless excluded" and then evaluating specific exclusions. With named perils, you may first have to prove the cause fits one of the listed perils. Either way documentation matters, but the form changes the burden of proof and the friction level at claim time.

When you request quotes, ask in writing: "Is this DP-3 Special Form on the dwelling? Is the dwelling settlement Replacement Cost or Actual Cash Value?"

Step 2. Coverage A: Set the Limit by Rebuild Cost, Not Purchase Price

Coverage A protects the physical structure and is your main financial lever. It sets the maximum available to repair or rebuild after covered damage.

How to choose a limit: Use the replacement cost to rebuild covering labor, materials, and contractor overhead at current prices, not what you paid for the property and not an online estimate. Land value is not insured. Rebuild cost is. If your insurer provides a replacement cost estimator, review the inputs covering square footage, roof type, and quality grade. Unique properties with historic features or high-end finishes require accurate specs rather than a standard calculator output.

Replacement Cost versus Actual Cash Value math: Replacement Cost pays what it costs to replace damaged property with like kind and quality without depreciation. Actual Cash Value generally equals replacement cost minus depreciation for age and wear. Here is a simplified example: a 15-year-old roof would cost $18,000 to replace. If depreciation is estimated at 50%, an ACV settlement might start around $9,000 before the deductible, leaving you to fund the difference out of pocket. RC may still involve additional steps depending on policy conditions, but the point is that ACV shifts aging-related costs to you.

Cost benchmark: Landlord policies commonly run 15% to 25% higher than homeowners insurance because rentals present different risks and claim patterns. This varies by location and underwriting.

If you are trying to control premium, increase the deductible before you downgrade dwelling settlement to ACV, especially on properties where a single large loss would strain your cash reserves.

Step 3. Coverage B: Do Not Forget Detached Garages, Fences, and Sheds

Coverage B covers structures set apart from the dwelling including detached garages, storage sheds, and fences depending on policy definitions. Underinsuring this line is common because landlords focus on the main structure.

Limit approach: Inventory what it would cost to rebuild each detached structure. A detached garage may run $25,000 to $60,000 depending on size and finishes. Fences add up quickly. If your policy sets Coverage B as a percentage of Coverage A, confirm the resulting dollar amount is actually sufficient for your site.

Real-world scenario: A wind event destroys a detached garage roof and damages the framing. Your Coverage A may be perfectly sized, but if the garage replacement value is $40,000 and Coverage B is capped at $20,000, you have a structural gap that no amount of good Coverage A will fix.

Take ten minutes: walk the property, list every detached structure, and roughly price each one. Then set Coverage B intentionally rather than accepting the default.

Step 4. Coverage C: Insure What You Own, Not What the Tenant Owns

Tenants' belongings are not your responsibility to insure under your landlord policy. Coverage C is for your property kept at the rental: appliances you provide, maintenance tools stored on-site, lobby furniture in a small multifamily, or landlord-owned furnishings in a furnished unit.

If your property is unfurnished and the tenant supplies everything, you may need very little Coverage C. If you include appliances such as a refrigerator, range, or washer and dryer, you likely need more. DP-3 forms typically treat personal property as named-perils coverage unless endorsed otherwise.

Short-term rental note: If you rent furnished or operate on platforms like Airbnb, your personal property exposure increases substantially covering beds, couches, linens, and kitchenware. Standard landlord policies may not contemplate frequent guest turnover or business-like activity without a short-term rental endorsement designed for that use case.

Make your Coverage C limit match the replacement cost of what you would buy tomorrow to re-furnish or re-equip the unit, then verify whether settlement is Replacement Cost or ACV for contents.

Step 5. Coverage D: Match the Timeline of Real Repairs, Not Your Best-Case Scenario

Coverage D, often called Fair Rental Value or Loss of Rent, replaces rental income when the property is uninhabitable due to a covered loss. It is one of the most misunderstood coverages: it does not pay for general vacancy. It pays when a covered peril causes the loss of use during the period of restoration.

Real-world example: A supply line bursts in an upstairs unit, soaking drywall and flooring. Remediation and rebuild take eight weeks due to drying time and contractor backlog. Rent is $2,200 per month. Your lost rent is roughly $4,400. If your Coverage D is capped at $4,000, you are short even before considering partial loss of rent, additional cleanup delays, or permit timelines.

How to pick a limit: Start with six to twelve months of gross rent as a planning range, then adjust for your market's rebuild times and whether you are in a catastrophe-prone area where contractors become scarce after a regional event. If it is a multi-unit building, consider whether a single loss could displace multiple units such as a fire in a common attic or a plumbing stack failure. That scenario pushes you toward higher limits.

Ask your agent in writing: "Is loss of rent limited to a dollar amount, a time period, or both? Is it based on fair rental value or scheduled rent?" Policy language varies and you should not assume.

Step 6. Coverage E and Medical Payments: Protect Your Balance Sheet From Injury Claims

Property damage can be expensive, but liability losses can be financially devastating because they involve both legal defense and potentially large judgments. Coverage E helps pay for legal defense and damages if you are found responsible for bodily injury or property damage to others. Medical Payments can cover smaller injuries regardless of fault and may reduce the chance a minor incident becomes a lawsuit.

Slip-and-fall scenario: A tenant's guest slips on icy steps, fractures an ankle, and alleges inadequate snow and ice removal. Even before any settlement, defense costs can add up quickly. The right question is not whether you will win. It is whether you can afford to defend the case.

Limit guidance: Many landlords start at $300,000 to $500,000 liability on the landlord policy and then add an umbrella for catastrophic cases. If you have higher net worth, multiple properties, a pool or trampoline, or frequent guest traffic from short-term rentals, pushing to $1 million in underlying liability is often a sensible base.

Stacking strategy with an umbrella: An umbrella sits above your underlying policies covering landlord and auto. The umbrella typically requires minimum underlying limits, and if you are under those minimums you may have a gap. Consider an umbrella when a single serious injury could exceed your landlord liability limit.

If you use a property manager, ask about adding them as an additional insured where appropriate so that liability arising out of property conditions does not become a coverage dispute between parties.

Step 7. Close the Common Gaps With Endorsements

Most landlord policies cover the obvious perils including fire and wind, but landlords get hurt by secondary costs covering code upgrades, water backup damage, and system failures that standard forms often exclude or limit.

Ordinance or Law and Building Code Upgrade: After a covered loss, rebuilding may require you to meet updated building codes covering wiring, smoke and CO detectors, sprinklers, or hurricane straps. Ordinance or law coverage helps pay those extra costs beyond simply putting the property back the way it was. Older properties and jurisdictions with aggressive code enforcement should strongly consider this endorsement.

Water Backup: Water backup is a classic "I assumed it was covered" loss. Many policies exclude or limit damage from sewer or sump pump backup unless you add a specific endorsement. A basement unit damaged when the sewer backs up during a heavy storm is not necessarily covered just because the policy covers "water damage" from a burst pipe.

Equipment Breakdown: This covers sudden, accidental mechanical and electrical breakdown of systems like HVAC units, water heaters, or electrical panels, events that are not always covered under standard property perils. Equipment breakdown coverage fills the gap between a normal covered peril and a mechanical failure.

Theft and Burglary: Some dwelling forms limit theft coverage unless endorsed, particularly in landlord contexts. Verify whether theft is included or requires a separate broadening endorsement.

Think in buckets when evaluating your coverage: Can you rebuild? That is Coverage A and B plus ordinance and law. Can you keep cash flow during a loss? That is Coverage D. Can you survive a lawsuit? That is liability plus an umbrella. Can you handle messy, frequent losses? That is water backup, equipment breakdown, and theft endorsements where relevant.

Step 8. Price It Realistically: Benchmarks, Drivers, and How to Reduce Costs Without Gutting Coverage

Landlord insurance pricing is highly local, but you should know whether your quote is in a reasonable range before you bind.

National benchmark range: Multiple industry summaries put typical landlord insurance at roughly $800 to $3,000 per year, with higher costs in catastrophe-exposed states and recent weather-driven pricing pressure.

Property-type and region examples:

Single-family rentals are often cited in the $2,100 to $4,000 per year range, varying widely by state and dwelling value. Texas market guides have cited approximate annual costs around $3,648. Florida is widely recognized as high-cost due to hurricane exposure, with pricing that remains sensitive to wind risk regardless of recent reform efforts.

Premium drivers to understand: Location hazards including wind, hail, and wildfire are the largest factors. Replacement cost inflation covering labor and materials has pushed limits and premiums higher. The age and condition of roof, plumbing, and electrical systems influence rating. Protection class and fire response characteristics can also affect pricing depending on local rating manuals.

Ways to reduce premium without creating large gaps: Raise the deductible only if you can comfortably cover it out of pocket. Add mitigation through roof upgrades, water leak sensors, and improved wiring or plumbing where needed since many carriers offer premium credits. Bundle policies or consolidate a portfolio with one carrier where it improves pricing and underwriting consistency. Avoid ACV on the dwelling as your savings lever unless you have modeled the worst-case out-of-pocket cost after depreciation.

Coverage Comparison: Homeowners vs. Landlord vs. Short-Term Rental

Homeowners policy: Designed for properties you live in. Renting the property out may violate occupancy rules and void coverage.

Landlord and Dwelling Policy DP-3: Designed for tenant-occupied long-term rentals. Dwelling covered on open-perils basis. Liability added as an endorsement rather than automatic. Loss of rent coverage for covered losses. Personal property coverage for landlord-owned items on the premises. Using the property as a short-term rental may be excluded without a specific endorsement.

Short-term rental endorsement or specialty policy: Designed for frequent guest turnover and host activity. Must contemplate guest injuries and higher foot traffic. Needs a lost booking income approach for revenue protection. Relying solely on platform host guarantees may leave significant gaps in coverage.

The most common and costly mismatch is using an owner-occupied homeowners policy for a tenant-occupied property. The second most common is using a standard landlord policy for a short-term rental without verifying that the policy covers the actual use.

Rental Property Insurance Checklist

Policy form and occupancy: Confirm the policy is written for tenant-occupied use rather than owner-occupied. Identify the form as DP-1, DP-2, or DP-3 Special Form. Ask about any vacancy clause restrictions during turnover. If vacancy may exceed approximately 60 days, ask about a vacancy permit or endorsement.

Property limits: Coverage A for the dwelling set to replacement cost rebuild, not purchase price. Confirm loss settlement as Replacement Cost or Actual Cash Value in writing. Coverage B for other structures covering detached garage, fence, and sheds sized to actual rebuild cost. Coverage C for landlord contents covering appliances and furnishings you own.

Income and liability: Coverage D for loss of rent confirmed as a dollar amount, a time period, or both, with the calculation method understood. Liability through Coverage E with a target of $300,000 to $1 million as a planning range. Umbrella coverage above that with underlying required limits confirmed.

Gap-closing endorsements: Ordinance or law and code upgrade coverage confirmed as yes or no. Water backup coverage confirmed as yes or no. Equipment breakdown coverage confirmed as yes or no. Short-term rental endorsement confirmed as yes or no if applicable.

Frequently Asked Questions

Can you require tenants to carry renters insurance?

In many markets landlords require it by lease terms because your landlord policy generally does not cover a tenant's belongings. Coverage C is for landlord-owned property, not tenant property. Requiring renters insurance protects both parties and reduces the likelihood of disputes after a loss affecting the tenant's possessions.

How often should you review your landlord insurance?

At minimum annually and whenever you renovate, change rent significantly, switch from long-term to short-term rental, or your property sits vacant longer than expected. Vacancy and use changes can affect coverage validity, so a policy that fit your situation last year may not fit it today.

Is flood or earthquake included in landlord insurance?

Typically not. Flood and earthquake are commonly excluded from standard dwelling policies and require separate coverage or endorsements depending on availability in your area. Run your address through FEMA's flood mapping tools to determine whether flood coverage belongs in your risk stack.

What is the biggest coverage mistake landlords make?

Using an owner-occupied homeowners policy for a tenant-occupied property is the most common and most costly mistake. The second is selecting Actual Cash Value settlement to save premium without modeling what depreciation actually costs after a major claim. Both mistakes tend to surface at the worst possible time.

Pull your current declarations page and rebuild your policy using the checklist above. Then get two competing quotes that match the same inputs covering DP-3 versus DP-3, the same deductibles, and the same endorsements so you are comparing equivalent coverage rather than comparing a full policy to a stripped one. If any quote will not clearly answer "RC or ACV" or explain how loss of rent is calculated, treat that as a red flag rather than a savings opportunity.

Book a demo to see how Shuk's expense tracking, vendor coordination, and maintenance documentation tools help you maintain the records that support a clean insurance claim if you ever need to file one.

Rental Management Guides
Tax Deductions Every Landlord Should Know (2026): A Practical, IRS-Compliant Guide to Maximizing Schedule E

Tax Deductions Every Landlord Should Know (2026): A Practical, IRS-Compliant Guide to Maximizing Schedule E

Rental property can be one of the most tax-advantaged ways to build long-term wealth, but only if you claim the deductions you are entitled to and document them the way the IRS expects.

Miss a deduction and you overpay. Misclassify one, say calling a new roof a repair when it is an improvement, and you invite notices, disallowed expenses, penalties, and a stressful back-and-forth during an audit.

The hard part is not that deductions are hidden. It is that the rules are detailed: mortgage interest has tracing and allocation rules, points are usually amortized rather than deducted all at once, depreciation starts when the home is placed in service rather than when you close, and the repairs-versus-improvements line can change the timing of your write-off by years. The IRS lays much of this out in Publication 527 and Publication 946, but few landlords have time to translate those documents into a step-by-step system they can run all year.

This guide walks you through the major rental-property deductions for 2026, the when and how of claiming each one, and the record-keeping habits that keep you fully compliant.

What You Will Learn and Why It Matters

Most independent landlords understand the basics: collect rent, pay expenses, report net income on Schedule E. The real savings come from mastering three areas: what is deductible, when it is deductible, and how to substantiate it.

IRS guidance for residential rentals centers on Schedule E reporting and the rules in Publication 527 covering Residential Rental Property and Publication 946 covering How To Depreciate Property.

The six core deduction categories covered below are mortgage interest including points, refinances, and mixed-use allocations; depreciation covering 27.5-year building write-offs, appliances, and bonus depreciation; repairs versus improvements and how classification affects timing and audit risk; operating expenses and the everyday costs that are often missed; travel deductions covering what qualifies and how to document mileage; and home office and administrative costs covering when you can claim them and how to support the deduction.

Each section includes a plain-English definition, the IRS rule to anchor your decision, an eligibility checklist, a worked example, specific action steps, and one common pitfall to avoid.

The Six Deduction Categories: Step-by-Step Workflows

1. Mortgage Interest: Points, Refinances, and Tracing Rules

What it is: Mortgage interest is generally deductible as a rental expense when the debt is tied to your rental activity, meaning the loan proceeds were used to buy, build, or improve the rental property, or otherwise used for rental purposes under interest tracing rules. Publication 527 and Schedule E instructions emphasize proper reporting and allocation when a property has any personal-use component.

Core IRS compliance rule: If you refinance or do a cash-out refinance, you may need to allocate interest based on how the proceeds were used. You do not automatically get "all interest is rental" treatment. The temporary interest allocation regulations under 26 CFR §1.163-8T provide the tracing framework.

Eligibility checklist: The property is held out for rent or treated as a rental activity. The loan proceeds were used for rental acquisition, improvement, or operations and are traceable. You can substantiate with statements, an amortization schedule, and closing documents such as a Closing Disclosure.

Worked example: You buy a four-plex and pay $18,400 of mortgage interest in 2026. You rent all units all year. You generally deduct the full $18,400 on Schedule E as a rental expense, subject to passive loss limitations discussed in the FAQ. If you live in one unit representing 25% personal use, you typically allocate the interest between personal and rental based on a reasonable method such as square footage or unit count, deducting only the rental portion on Schedule E.

Points and loan fees: For rentals, points and origination fees are usually amortized over the life of the loan rather than deducted all at once. This is a common landlord miss that results in either a lost deduction or an improper full deduction in year one.

What to do now: Create a loan proceeds map. If you refinance, document exactly where cash-out funds went using invoices and a bank paper trail. This supports interest tracing under §1.163-8T. Also track points as an amortized asset by setting up a recurring monthly amortization entry so you do not forget a legitimate deduction that spans years.

Pitfall to avoid: Deducting 100% of interest on a cash-out refinance when part of the proceeds paid personal expenses. Without tracing and allocation documentation, that portion may be disallowed.

Mini case study: A duplex owner refinanced and used part of the cash-out to replace the HVAC, a rental improvement, and part to pay off personal credit cards. After organizing proceeds with bank transaction links and categorizing receipts, they deducted only the properly traceable interest on Schedule E, avoiding an all-or-nothing position that can collapse under scrutiny.

2. Depreciation: 27.5-Year Buildings, Appliances, and Recapture

What it is: Depreciation is the annual deduction for the wear-and-tear of your rental assets. Residential rental buildings are generally depreciated using MACRS over 27.5 years using the straight-line method with a mid-month convention. Depreciation typically begins when the property is placed in service, meaning ready and available for rent, not necessarily when you close on the purchase.

What counts: Your depreciable basis is usually the purchase price plus certain acquisition costs and later capital improvements, minus land value. Land is not depreciable. Publication 527 and Publication 946 provide the framework for basis and MACRS recovery.

Eligibility checklist: You own the property and use it for rental or income production. You can allocate land versus building value, often using local assessment records as a starting point. You track the placed-in-service date and improvement dates since the mid-month convention impacts the first-year deduction.

Worked example: You purchase a single-family rental for $400,000. Local records support allocating $80,000 to land and $320,000 to building. Your annual building depreciation is roughly $320,000 divided by 27.5 years, which equals approximately $11,636 per full year before first-year mid-month adjustments. You report depreciation on Form 4562 and flow it to Schedule E.

Appliances and shorter-life assets: Items like appliances, carpeting, and some building components may have shorter recovery periods than the 27.5-year building, often five, seven, or fifteen years, which can accelerate deductions, especially when paired with a well-supported cost segregation approach.

Bonus depreciation: Current practitioner guidance indicates 100% bonus depreciation was restored for qualifying property placed in service after January 19, 2025 under interim guidance. This generally applies to assets with recovery periods of 20 years or less and does not apply to the 27.5-year building itself. Confirm eligibility by asset type and placed-in-service date and document thoroughly before claiming.

What to do now: Separate assets in your books from day one by tracking building, land improvements, and personal property as distinct categories so you are not stuck reconstructing five years of records. Treat every major improvement as its own depreciation schedule since a roof, remodel, or new HVAC is typically a new asset placed in service when completed rather than a retroactive addition to the original building basis.

Pitfall to avoid: Skipping depreciation because it feels complicated. Depreciation can still affect gain calculations and may be subject to recapture rules when you sell under the unrecaptured Section 1250 gain concept. Not claiming depreciation does not make recapture go away.

Mini case study: A four-plex owner replaced all unit refrigerators and added new carpeting. By tracking each purchase as a separate asset class rather than burying it in the repairs category, they captured faster depreciation on personal property and kept clean support files including invoice, installation date, and unit assignment, which simplified Form 4562 reporting at tax time.

3. Repairs vs. Improvements: The Line That Changes Timing and Scrutiny

What it is: Repairs are generally costs that keep your property in ordinarily efficient operating condition and are often deductible in the year paid or incurred. Improvements generally add value, prolong useful life, or adapt the property to a new use and are typically capitalized and depreciated. Publication 527 instructs landlords to treat improvements differently from repairs.

Why it matters: This classification is one of the most common places landlords get into trouble because the tax impact is immediate. A $9,000 repair might be fully deductible now, but a $9,000 improvement may be spread over years. Tax court outcomes often turn on documentation, consistency, and the facts and circumstances of the specific work performed.

Eligibility checklist: Did the work fix a specific issue, which points toward a repair, or upgrade or replace a major component, which often points toward an improvement? Is the work part of a larger renovation plan, which typically points toward capitalization? Do you have itemized invoices describing labor, materials, and scope, which are critical support in any dispute?

Worked example: You pay $650 to patch a small roof leak and replace damaged shingles. This is often a repair. But a $14,500 full roof replacement is typically an improvement that would be depreciated as a separate asset. Publication 527 explains that improvements must be recovered through depreciation rather than expensed like routine repairs.

What to do now: Split invoices when possible. If a contractor can separately invoice repair items versus betterment items, you have stronger support for the portion currently deductible in the year incurred. Also write a one-paragraph purpose memo for big projects. Save a short note explaining what failed, what you did, and why it qualifies as a repair or improvement. Pair it with before and after photos and the invoice.

Pitfall to avoid: Calling turnover work a repair when it is clearly a remodel with new kitchen cabinets, layout changes, or full flooring replacement across a unit. Those facts can undermine credibility if the return is examined.

Mini case study: A short-term rental host renovated a bathroom and also fixed a running toilet in a different unit. By categorizing the toilet repair as repairs and maintenance and capitalizing the bathroom renovation as an improvement with its own placed-in-service date, the host kept records clean and avoided an end-of-year scramble to reclassify expenses after the fact.

4. Operating Expenses: The Everyday Deductions That Add Up

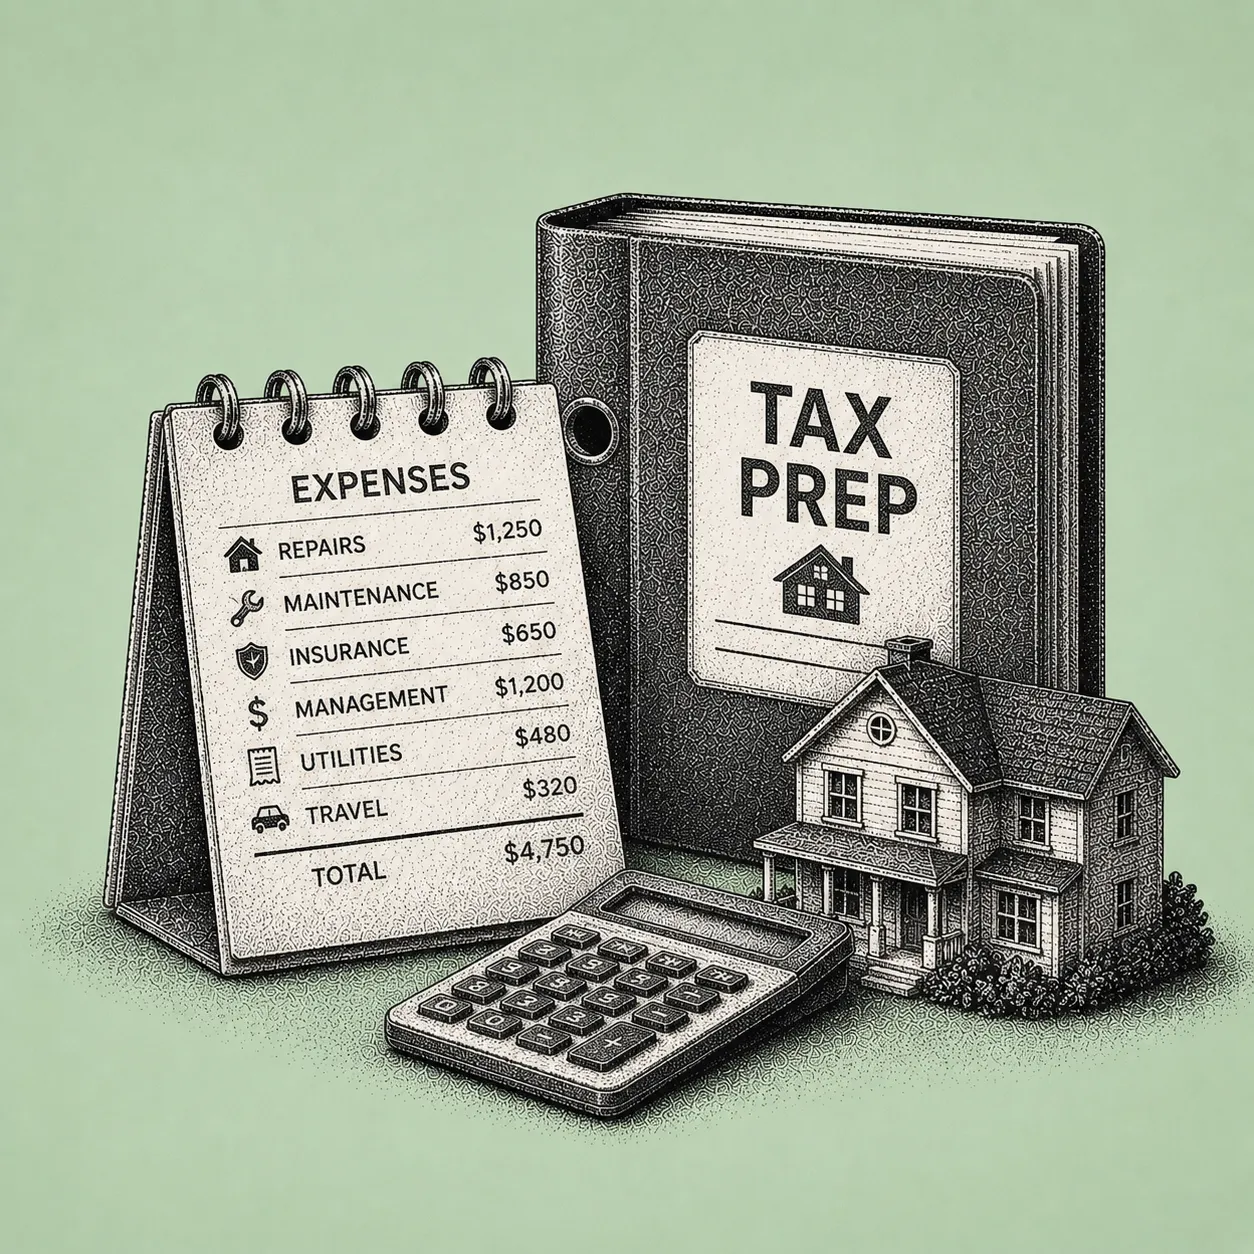
What they are: Operating expenses are ordinary and necessary costs to manage, conserve, and maintain your rental property. They are typically deducted in the year incurred and reported on Schedule E in categories including advertising, cleaning and maintenance, commissions, insurance, legal and professional fees, management fees, utilities, and supplies. Publication 527 and Schedule E instructions emphasize allocating costs when a property has mixed rental and personal use.

What landlords commonly miss: Bank charges tied to rental accounts. Tenant screening fees. Software subscriptions used for rental bookkeeping. Small tools and supplies used exclusively for maintenance. Professional services including CPA fees, attorney fees for drafting a lease, and eviction filing fees, though deductibility of legal fees depends on facts and timing and can be nuanced.

Worked example: You self-manage a single-family rental. In 2026 you pay $1,450 in insurance, $650 for lawn care, $310 in listing fees, $980 to a plumber, $1,200 for CPA and tax prep, and $720 for a bookkeeping subscription used solely for your rentals. These are generally operating expenses deductible on Schedule E, subject to capitalization rules if any invoice is actually for an improvement.

What to do now: Use Schedule E categories all year rather than only at tax time. If you bucket expenses the way Schedule E expects throughout the year, you reduce errors and rework at filing. Also attach every expense to a property and a purpose. Multi-property landlords should tag each receipt to a specific address or unit and category so that any question about what was spent where can be answered in seconds.

Pitfall to avoid: Lumping large vague totals into one line such as calling everything repairs or other without supporting invoices. If you are ever asked to substantiate, you want a clean trail showing payee, date, amount, purpose, property, and supporting document.

5. Travel Deductions: Mileage, Trips, and Documentation

What they are: Travel costs can be deductible when they are ordinary and necessary for your rental activity, covering property visits for repairs, meeting contractors, buying supplies, or collecting rents where applicable. The catch is that travel is easy to abuse and easy to document poorly, which makes it a frequent scrutiny point.

IRS anchor: While Publication 463 is the IRS travel and vehicle substantiation guide, the key principle is consistent documentation covering business purpose, date, destination, and mileage or expense records.

Eligibility checklist: The trip is primarily for rental business. You can document date, miles, and purpose. You allocate mixed-purpose trips and claim only the business portion.

Worked example: You drive 18 miles round-trip to meet a plumber at your rental, then 12 miles round-trip to pick up a replacement smoke detector. You log each trip with date, starting and ending odometer reading or an app mileage capture, the property address, and the purpose. Your deduction is total miles multiplied by the applicable IRS standard mileage rate for the tax year.

What to do now: Log mileage in real time rather than reconstructing it later. Reconstructed logs are weak if questioned. Use an app or a simple form that captures purpose and property for each trip at the time it happens. Keep receipts for away-from-home travel. If you travel overnight primarily for rental business, retain lodging receipts and a schedule showing the business activities conducted.

Pitfall to avoid: Claiming commuting miles as rental travel. Driving from home to your W-2 job or any unrelated workplace is not rental business mileage, and mixing categories is a classic red flag.

Mini case study: A small-portfolio landlord with three properties was consistently under-claiming travel because receipts and mileage records were scattered. After switching to a system that captures trips and ties them to properties, they stopped missing deductible supply runs and contractor visits and reduced time spent reconstructing mileage records at year-end.

6. Home Office and Administrative Costs: When You Can Legitimately Claim Them

What they are: Home-office and administrative costs can be deductible when you use part of your home regularly and exclusively for managing your rental activity and it is your principal place of business for that activity. Even if you do not qualify for a home-office deduction, you may still deduct direct administrative expenses tied to rentals including postage, a dedicated phone line, office supplies, and bookkeeping and tax preparation costs when they are ordinary and necessary.

Eligibility checklist for the home office: Regular and exclusive use of a specific area. Used for rental management activities including communications, bookkeeping, tenant screening, and lease work. You can substantiate with a simple floor plan measurement, photos, and utility bills.

Worked example: You manage a four-plex from a dedicated 120 square foot office in a 1,200 square foot home, representing 10% of the space. If eligible, you may allocate 10% of qualifying home expenses such as utilities and certain maintenance to your rental administrative activity, plus deduct 100% of direct office expenses like a desk or printer used solely for rentals, subject to depreciation rules for equipment.

What to do now: Separate admin from property expenses. Tag costs as either property-specific such as Unit 2 plumbing or portfolio admin such as bookkeeping and office supplies. This prevents double-counting and makes Schedule E preparation cleaner at filing time.

Pitfall to avoid: Claiming a home office that is not exclusive, such as a dining table or shared guest room. If you cannot defend exclusivity, focus instead on the clearly deductible administrative expenses you can fully support such as tax preparation fees, software subscriptions, postage, and a dedicated landlord phone line.

Mini case study: A single-family landlord tried to claim a home office but realized the space doubled as a guest room. They skipped the home-office allocation and instead tightened administrative deductions they could fully support, keeping their file clean and defensible without sacrificing legitimate write-offs.

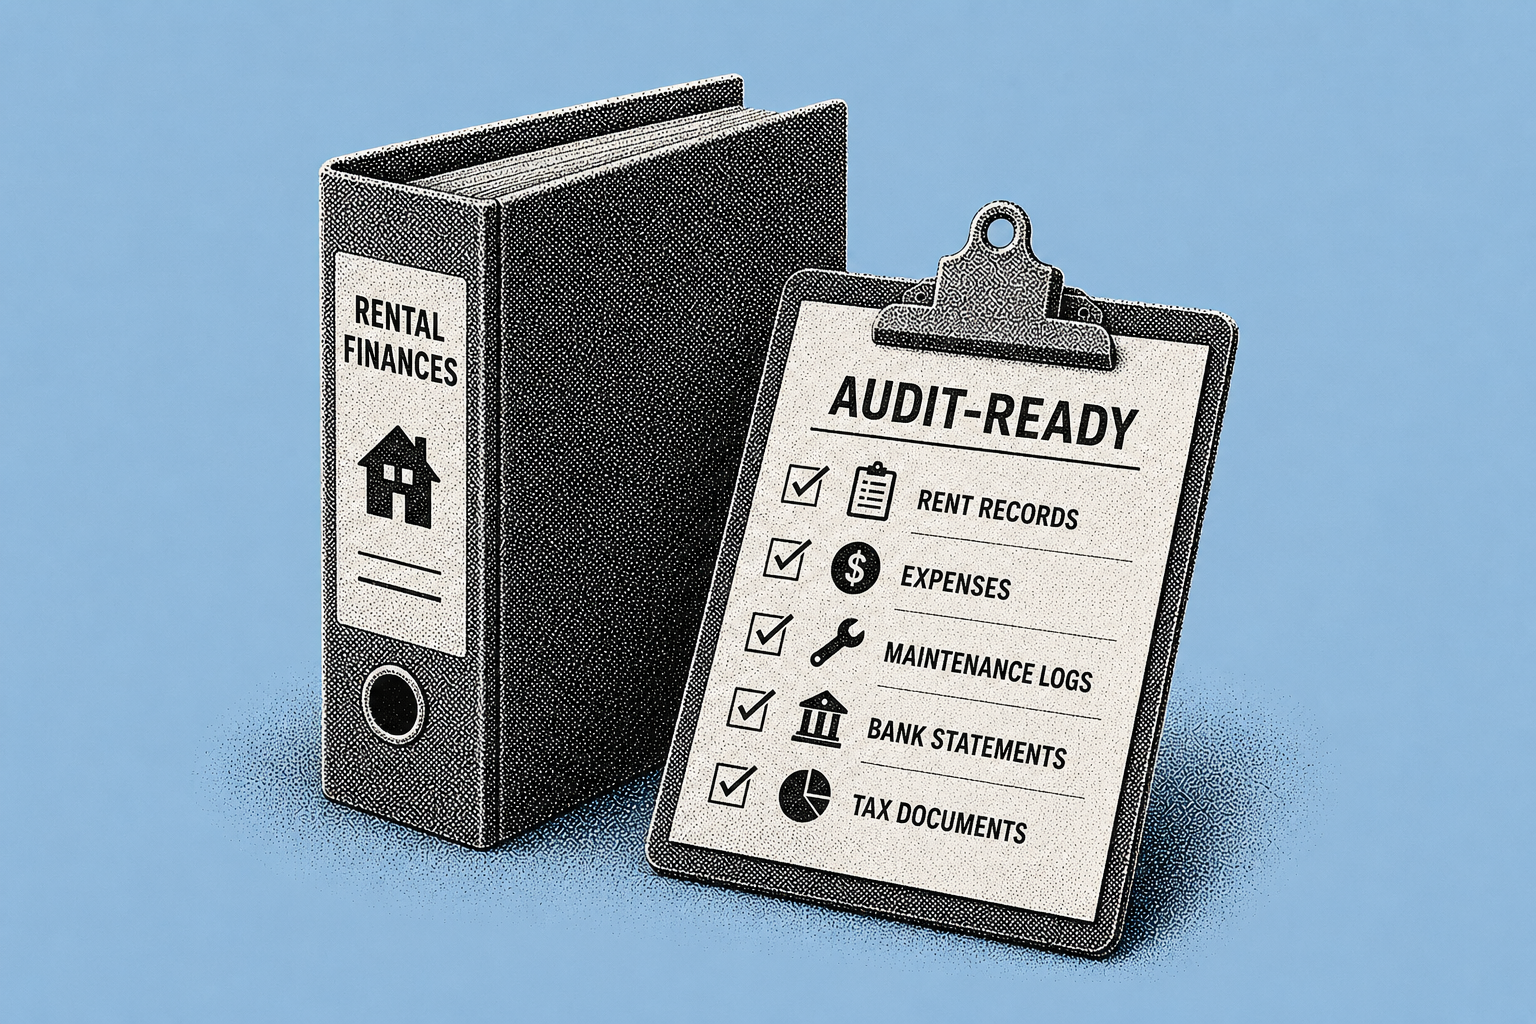
Year-Round Checklist: Stay Audit-Ready

Create a separate bank account and card for rental activity to keep funds clearly segregated from personal transactions.

Save your Closing Disclosure and loan documents and track points and origination fees for amortization over the life of the loan rather than treating them as a single-year deduction.

Maintain a fixed-asset list covering building basis less land, improvements, appliances, and other depreciable items with placed-in-service dates for each.

Categorize every transaction to a Schedule E category and a specific property or unit at the time it happens rather than sorting it all at year-end.

Store invoices, receipts, and contracts with short notes indicating what was purchased, why it was purchased, and which property it relates to.

Keep mileage and travel logs contemporaneously with date, miles, purpose, and property recorded at the time of each trip.

Review the repairs-versus-improvements classification quarterly and reclassify before year-end if needed rather than discovering a misclassification during filing.

Frequently Asked Questions

When do I report rental income and expenses on Schedule E?

You generally report rental income and deductible expenses annually on Schedule E with your Form 1040. The Schedule E instructions explain the expense categories and how to report them consistently. All rental income received during the year is reported, and deductible expenses are listed by category for each property.

Can I depreciate appliances separately from the building?

Often yes. Publication 946 explains that different assets can have different recovery periods under MACRS. Appliances and certain personal property typically depreciate over shorter lives than the 27.5-year building, which can accelerate deductions when tracked and documented correctly from the time of purchase.

What are passive loss limits and can they reduce my deduction this year?

Rental real estate is commonly treated as a passive activity with limited exceptions, which can restrict how much loss you can use against other income in a given year. If losses are limited under the passive activity rules, they typically carry forward to future years when you have passive income or sell the property.

If I did not take depreciation in prior years, can I fix it?

Often yes, but the correction method depends on the facts and may involve an accounting method change filed with the IRS. At a minimum, understand that depreciation affects gain calculations and may be subject to recapture rules when you sell, regardless of whether you actually claimed the deductions in prior years. Consult a tax professional before attempting a catch-up correction.

If you want to maximize deductions and reduce compliance stress, make this your operational standard: every expense should be categorized to the right Schedule E line, tied to the right property or unit, and backed by a retrievable source document. Start by running a Schedule E readiness check using the checklist above.

Book a demo to see how Shuk's expense tracking, receipt organization, and property-level categorization tools help you keep records tax-ready throughout the year rather than scrambling at filing time.

Rental Management Guides
Maintenance & Repairs: A Practical Guide to Rental Property Maintenance for Landlords

Maintenance & Repairs: A Practical Guide to Rental Property Maintenance for Landlords

Effective rental property maintenance is one of the most important responsibilities for landlords and property managers. Well-managed maintenance and repairs reduce vacancies, protect property value, and improve tenant satisfaction. Poor maintenance, on the other hand, leads to higher costs, legal risk, and negative tenant experiences.

This guide explains how landlords can manage maintenance and repairs efficiently, using clear workflows, preventive strategies, and modern tools—without overcomplicating daily operations.

This guide is part of our rental management guides for independent landlords, covering the key workflows involved in managing rental properties efficiently.

What Is Rental Property Maintenance?

Rental property maintenance refers to the ongoing process of keeping a rental unit safe, functional, and compliant with housing standards. It includes routine upkeep, preventive maintenance, emergency repairs, and tenant-reported issues.

For landlords, maintenance is not optional. It directly impacts:

  • Tenant retention

  • Property value

  • Legal compliance

  • Long-term operating costs

Maintenance and Repairs for Landlords: Core Responsibilities

Landlords are typically responsible for maintaining:

  • Plumbing, electrical, and HVAC systems

  • Structural elements (walls, roofs, flooring)

  • Safety features such as smoke detectors and locks

  • Appliances provided with the rental unit

Understanding landlord maintenance responsibilities helps avoid disputes and ensures faster resolution of repair requests.

Most maintenance issues originate from tenant requests, making communication workflows critical.

How to Manage Rental Maintenance Requests Efficiently

Handling maintenance requests manually often leads to delays and missed issues. A structured rental maintenance management process improves response time and transparency.

Best practices include:

  • Centralizing all maintenance requests in one system

  • Categorizing issues by urgency

  • Assigning clear response timelines

  • Keeping tenants informed throughout the repair process

This approach helps landlords stay organized and reduce unnecessary follow-ups.

Responsive maintenance is one of the primary ways landlords build a reputation that drives renewals — see the standing out as a quality landlord guide for the full service standards framework.

Preventive Maintenance for Rental Properties

Preventive maintenance for rental properties focuses on identifying and fixing small issues before they become costly repairs.

Examples include:

  • Seasonal HVAC inspections

  • Plumbing leak checks

  • Roof and gutter inspections

  • Appliance servicing

Preventive maintenance reduces emergency repairs and extends the life of major systems.

Timely maintenance plays a major role in tenant retention and renewal decisions.

Handling Emergency Repairs in Rental Properties

Emergency repairs involve issues that affect health, safety, or habitability—such as water leaks, power failures, or heating system breakdowns.

To manage emergencies effectively:

  • Define what qualifies as an emergency

  • Establish 24/7 response protocols

  • Pre-approve vendors for urgent repairs

  • Track response and resolution times

Clear emergency workflows reduce tenant frustration and legal exposure.

Property Repairs Management and Vendor Coordination

Reliable vendors are essential for effective property repairs management. Landlords should focus on:

  • Licensing and insurance verification

  • Response time reliability

  • Quality of completed work

  • Clear communication standards

Documenting expectations helps maintain consistency and accountability across vendors.

Using Technology for Rental Maintenance Management

Modern rental maintenance management tools help landlords:

  • Track maintenance requests

  • Prioritize urgent repairs

  • Coordinate vendors

  • Maintain repair history records

Technology simplifies maintenance operations and provides visibility across multiple properties without increasing administrative workload.

Maintenance Workflow Checklist for Landlords

Use this checklist to manage maintenance and repairs consistently:

  • Log all tenant maintenance requests

  • Categorize by urgency (routine vs emergency)

  • Assign tasks to approved vendors

  • Track repair progress and completion

  • Confirm resolution with tenants

  • Review recurring issues for preventive action

Frequently Asked Questions (FAQ)

What is rental property maintenance?

Rental property maintenance includes routine upkeep, preventive care, and repairs required to keep rental units safe, functional, and compliant with regulations.

What maintenance is a landlord responsible for?

Landlords are generally responsible for structural elements, essential systems, safety features, and appliances provided with the rental.

How should landlords handle maintenance requests?

Landlords should centralize requests, prioritize urgent issues, communicate timelines clearly, and document all repairs.

What qualifies as an emergency repair?

Emergency repairs involve issues that affect safety or habitability, such as water leaks, heating failures, or electrical hazards.

Why is preventive maintenance important for rental properties?

Preventive maintenance reduces long-term repair costs, prevents emergencies, and improves tenant satisfaction.

Conclusion

Managing maintenance and repairs becomes significantly easier when requests, priorities, and repair histories are organized in one place. Many landlords choose to use rental management platforms like Shuk Rentals to centralize maintenance requests, track repairs, coordinate vendors, and maintain clear communication with tenants—helping reduce delays and improve overall efficiency without increasing administrative workload.

Rental Management Guides
Tenant Communication Strategies: A Practical Guide for Landlords

Tenant Communication Strategies: A Practical Guide for Landlords

Strong tenant communication strategies are a foundation of successful rental property management. Clear, timely, and documented communication helps landlords reduce disputes, improve tenant retention, and stay compliant with housing regulations.

This guide is part of the Landlord Challenges hub for independent landlords managing 1 to 20 units.

This guide explains how landlords can communicate with tenants effectively throughout the rental lifecycle—covering communication channels, response standards, documentation, and conflict handling.

This article is part of the rental management guides series for independent landlords and small property managers.

What Are Tenant Communication Strategies?

Tenant communication strategies refer to the systems, channels, and processes landlords use to share information, handle requests, and maintain clear two-way communication with tenants.

Effective communication supports:

  • Tenant satisfaction and trust

  • Faster issue resolution

  • Legal compliance

  • Lower tenant turnover

For the broader operational picture of how communication quality affects tenant retention and landlord reputation, see the standing out as a quality landlord guide.

Tenant communication doesn’t stop at messages—it directly impacts maintenance outcomes and lease renewals.

Why Effective Landlord–Tenant Communication Matters

Poor communication is one of the most common causes of tenant dissatisfaction and early move-outs. Missed messages, unclear expectations, or undocumented conversations can also lead to legal disputes.

For new landlords, a strong communication system starts with understanding the basics of getting started as a landlord and setting expectations early.

Well-defined landlord tenant communication best practices help landlords:

  • Set clear expectations

  • Respond consistently

  • Reduce misunderstandings

  • Maintain professional boundaries

Choosing the Right Communication Channels

Landlords should identify and standardize approved communication channels early in the tenancy.

Common channels include:

  • Email for official notices and documentation

  • Text messages for quick updates (with consent)

  • Tenant portals for requests and announcements

  • Phone calls for urgent or sensitive matters

Using consistent channels improves response times and record-keeping.

Setting Communication Response Standards

Tenants expect predictable responses. Establishing response timelines improves trust and reduces follow-ups.

Best practices include:

  • Emergency issues: immediate acknowledgement

  • Maintenance requests: response within 24–48 hours

  • General inquiries: response within one business day

Clear response standards are a core part of tenant communication best practices.

Automating Routine Tenant Communication

Automation helps landlords reduce manual work while keeping tenants informed.

Many routine reminders work best when paired with clear rent collection strategies that reduce missed payments and follow-ups.

Examples of automated communication:

  • Rent due reminders

  • Maintenance status updates

  • Lease renewal notices

  • Policy or building updates

Automation ensures consistency without losing professionalism.

Documenting Tenant Communication for Compliance

Maintaining a written record of tenant communication protects both parties. Documentation is especially important for:

  • Maintenance approvals

  • Lease changes

  • Notices and warnings

  • Dispute resolution

Following up verbal conversations with written summaries helps avoid confusion and supports compliance.

Handling Conflicts and Sensitive Conversations

Conflicts should be handled with clarity, empathy, and consistency.

Best practices for conflict communication:

  • Stick to documented facts

  • Use neutral, professional language

  • Avoid emotional responses

  • Escalate issues when required by law

Structured communication reduces escalation and protects landlord credibility.

Two-Way Communication and Feedback

Encouraging tenant feedback helps landlords identify issues early and improve retention.

Examples include:

  • Post-maintenance feedback

  • Periodic satisfaction surveys

  • Renewal feedback conversations

Two-way communication strengthens long-term tenant relationships.

Tenant Communication Checklist for Landlords

  • Define approved communication channels

  • Set response time standards

  • Automate routine messages

  • Document all important interactions

  • Train anyone communicating with tenants

  • Review communication processes regularly

Frequently Asked Questions

What is the best way for landlords to communicate with tenants?

The best approach combines written communication for documentation with quick channels like portals or texts for timely updates.

Are landlords allowed to text tenants?

Yes, but consent is required in many regions. Landlords should also provide opt-out options.

How should landlords document verbal conversations?

Follow up verbal discussions with a written summary via email or secure messaging.

How often should landlords communicate with tenants?

Communication should be proactive but not excessive—mainly for maintenance, notices, and important updates.

Why is tenant communication important in property management?

Clear communication reduces disputes, improves satisfaction, and supports legal compliance.

Conclusion: Simplifying Tenant Communication

Managing tenant communication becomes easier when messages, requests, and records are centralized. Platforms like Shuk Rentals help landlords organize tenant conversations, track requests, automate routine updates, and maintain clear communication—supporting stronger tenant relationships without increasing administrative workload.

Rental Management Guides
Lease Renewal Management: A Practical Guide for Landlords

Lease Renewal Management: A Practical Guide for Landlords

Effective lease renewal management plays a critical role in tenant retention, vacancy reduction, and predictable rental income. A well-planned renewal process helps landlords avoid unnecessary turnover costs while maintaining strong tenant relationships.

This guide explains how landlords can manage lease renewals efficiently using structured workflows, clear communication, and compliant processes.

This guide is part of our rental management guides hub covering the full landlord operations workflow.

What Is Lease Renewal Management?

Lease renewal management is the process of tracking lease expirations, communicating with tenants, adjusting terms when needed, and finalizing renewed agreements in a timely and legally compliant manner.

Strong lease renewal practices help landlords:

  • Reduce vacancy periods

  • Improve tenant retention

  • Maintain steady cash flow

  • Avoid last-minute legal or operational issues

Why Lease Renewal Management Matters for Landlords

Tenant turnover is expensive and time-consuming. Poor renewal planning often leads to rushed decisions, missed notices, and avoidable vacancies.

Effective lease renewal management for landlords ensures:

  • Early visibility into tenant intentions

  • Smoother negotiations

  • Better planning for rent adjustments

  • Consistent compliance with local laws

The renewal timeline

When to do what, working back from lease end

Six months of lead time turns renewals from a 30-day scramble into a planned conversation.

6 mo
Track

Calendar every lease ending in the next six months in one view.

5 to 3 mo
Signal

Check in informally. Renewal doubt almost always shows up here, months before the 30-day notice window.

2 mo
Decide

Set the rent and draft the renewal terms. State notice rules set your deadline.

1 mo
Notify

Send the formal renewal offer on the timeline your state requires.

Lease end
Finalize

Sign the renewal, or start listing the unit. With early signal, neither outcome is a scramble.

Shuk's Lease Indication Tool sits in the signal phase, polling tenants at 6, 5, 4, and 3 months to flag renewal doubt early.

Step-by-Step Lease Renewal Management Process

1. Track Lease Expiration Dates Early

Start monitoring lease end dates at least 90 days in advance. Early tracking gives landlords time to assess tenant satisfaction and plan next steps.

2. Understand Tenant Renewal Intentions

Communicate proactively with tenants to understand whether they plan to renew. Early conversations help address concerns and reduce unexpected move-outs.

3. Review Legal Notice Requirements

Lease renewals and rent changes must follow local and state regulations. Landlords should confirm notice periods, rent increase limits, and documentation requirements before initiating renewals.

4. Plan Rent Adjustments Carefully

When adjusting rent, consider:

  • Market conditions

  • Property improvements

  • Tenant history and reliability

Balanced decisions improve acceptance rates and long-term retention.

5. Maintain Clear Renewal Communication

Strong tenant communication strategies help landlords discuss renewals early and reduce avoidable turnover.

Clear, timely communication helps avoid misunderstandings. Provide tenants with:

  • Renewal timelines

  • Updated terms (if any)

  • Next steps for confirmation

Consistency builds trust and improves renewal outcomes.

6. Finalize Renewals Efficiently

Once terms are agreed upon, complete the renewal process promptly. Digital documentation and clear records help reduce delays and administrative effort.

Successful lease renewals are rarely about pricing alone. Strong rent collection strategies and clear communication also influence renewal decisions.

Lease Renewal Checklist for Landlords

  • Track lease expiration dates

  • Confirm tenant renewal intent

  • Review legal notice requirements

  • Plan rent adjustments

  • Communicate renewal terms clearly

  • Finalize and document agreements

Frequently Asked Questions

When should landlords start the lease renewal process?

Most landlords begin lease renewal discussions 60–90 days before the lease expires.

Can landlords increase rent during renewal?

Yes, provided the increase follows local regulations and required notice periods.

What happens if a tenant does not respond to a renewal notice?

Landlords should follow up promptly and prepare for either renewal or vacancy planning.

Is digital lease renewal legally valid?

In most regions, digitally signed lease renewals are legally valid when properly documented.

Conclusion: Simplifying Lease Renewal Management

Managing lease renewals becomes easier when landlords have clear visibility into lease timelines, tenant intentions, and compliance requirements. Platforms like Shuk Rentals help landlords stay organized by centralizing lease tracking, renewal workflows, and communication—supporting smoother renewals and better tenant retention without adding operational complexity.

Frequently Asked Questions

Find answers to common questions about our products and services

How do I manage a rental property if I work full-time?

faq dropdown toggle

What are the biggest legal risks for independent landlords?

faq dropdown toggle

How much should I budget for repairs and maintenance?

faq dropdown toggle

Is online rent collection worth it for a small portfolio of 1 to 10 units?

faq dropdown toggle

What is the most effective way to reduce vacancy without cutting rent?

faq dropdown toggle

What is the biggest risk of scaling a rental portfolio without systems?

faq dropdown toggle
Final Note

The rental management problems that cost landlords the most are almost always rooted in inconsistency: screening decisions applied differently across applicants, rent policies enforced selectively, maintenance requests tracked informally, and financial records assembled from memory rather than documented systems. Platforms like Shuk Rentals address this by bringing rent collection, maintenance tracking, lease management, tenant communication, and renewal workflows into one connected system so every tenancy runs on the same documented process.